| Home | How to view these pages in your browsers |
| Easier to Read BCD436HP/BCD536HP |
| Digital Scanner Manual |
|
Click here to buy a printed, bound, formatted in color, copy of this manual from Scanner Master |
|
See also the Sentinel BCD436/536HP Software Manual |
Last Updated January 23, 2018 |
![]()
| Contents |
| Intro/Review | Scanning |
| Main Features | Selecting Quick Keys |
| Understanding CTCSS/DCS/NAC | View Current QK Status |
| Understanding Trunking | View Any QK Status |
| Multi-Site Trunking | Selecting Service Types |
| Understanding DMR | Toggle Display Modes |
| Understanding IDs | Toggle ID Scan/ID Search |
| Understanding the Memory | Replay Transmissions |
| Understanding Quick Keys | Start/Stop Recording |
| Using Batteries | Review Recordings |
| Connecting the USB Cable | Scan Hold |
| Turning on the Scanner | Avoiding Transmissions |
| Navigating the Menus | Store a Channel from the Database |
| Data Naming | Advanced Channel Memory |
| Key Operations | Edit Current Channel |
| Set Your Location | Add to Favorites List |
| Understanding Range | Save Sub Audio/P25 NAC |
| Selecting Service Types | Save TGID |
| Display Options | Save Unit ID |
| Set Backlight/Dimmer | Store a Search Frequency (Search with Scan) |
| Disp. Unit ID | Attenuation |
| Set ID Format | Modulation |
| 3-Line Display Mode (BCD536HP) | Intermediate Frequency Exchange |
| Viewing the Battery Level | View Repeater Frequency |
| A Look at the Display | Channel Volume Offset |
| Settings | Priority Modes |
| Adjust Key Beep | Weather Alert Priority |
| Battery Options | Close Call Modes |
| Band Defaults | Direct Frequency/ID Entry |
| Auto Shutoff | Using Number Tags |
| Set Clock | Review Scan Avoids |
| Replay Options | Custom Search by Search Quick Key |
| Restore Options | P25 Adjustment Mode |
| See Scanner Info | Using a GPS |
| Using the Keypad Lock (BCD436HP) | Discovery Mode |
| Wi-Fi Setup (BCD536HP) | Session Options |
| Planning Favorites Lists | Review Discovery |
| Worksheets | Search/Close Call Options |
| Manage Favorites Lists | Freq Avoids |
| Favorites List Options | Broadcast Screen |
|
|
Review FL Avoids | Search for... Menu |
|
|
|
|
|
|
|
|
|
|
|
|
|
|
|
|
|
|
|
|
|
|
|
|
|
|
|
|
|
|
|
|
|
|
|
|
|
|
|
|
|
|
|
|
|
|
|
|
|
|
|
|
|
![]()
| Intro/Review | Contents |
|
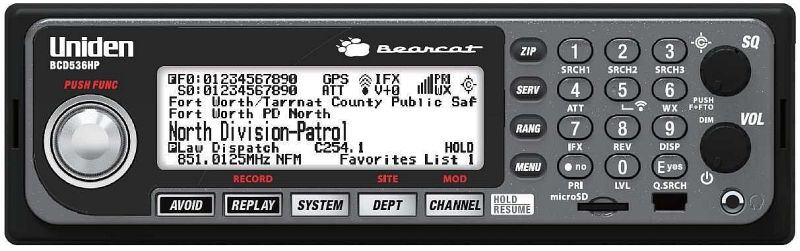
Uniden has combined the new features of the HP-1 with traditional hand-held and base/mobile styles of the XT series scanners and come up with the new BCD436HP hand-held, and BCD536HP base/mobile scanners. Just enter your zip/postal code, select your service types, set a range to filter distance and the scanner will select the channels from the database to monitor. Support for P25 Phase II and P25 X-2 TDMA is finally here. The BCD536HP will have a Wi-Fi dongle and a companion Siren App that allows "connectivity to your smart phone or tablet from anywhere in your house, your car, or the world". Recording, playback, and instant replay for scan, search, Close Call, and Tone-Out modes are new. We now have quick keys for Favorites Lists, Systems, Sites, and Departments. You can tag any channel, system, site, etc. with up to 64 characters (though not all viewable in the display). Number tags for Favorites Lists are also included. Priority DND, first appearing in the BC125AT, is now included. Encrypted IDs are now muted when received too. We also have a printed manual included with the scanners that will be updated online. Long overdue is a per channel delay setting. As with the HP-1, you can scan up to 256 Favorites Lists (but there are only 100 Quick Keys-available only once for each Favorites List) along with or just the database. The complete Radio Reference Database for the US and Canada is included on a 4 GB micro SD card with locations programmed so you don't need a GPS unit to scan by location. One of the best features Uniden has come out with is being able to scan by services types, i.e. police, fire, air, etc. Like the HP-1, we can hold on any channel, department, system, and now even a site. Discovery mode has also been brought over from the HP-1. Similar to auto store, you can also record transmissions, log information, and compare hits to the database. The included Sentinel software has the same look and feel as the old HP-1 software. A lot of features have changed and they've moved some of
the old options around in the menus if you are used to the
older T and XT models. The SQ/Vol knobs have been reversed with the scroll
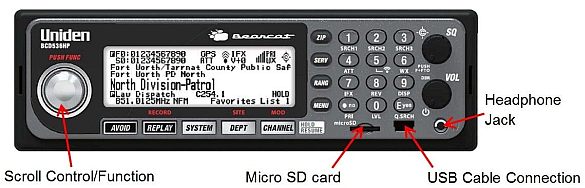
knob on the base model and the Scan-Search/Hold buttons are gone. The alert LED is a
glowing ring around the scroll/function knob on
the the BCD536HP, and has replaced the display color selection for alerts. The alert LED on the hand-held
model is below the display, below the keypad, on the left. The addition of Favorites Lists has
reduced the number of quick keys we have to press, but increased the number we
have to remember. The the scanners still scans in System order, not Favorites
List order as you would think. Everything is now "Avoided" like the
HP-1 instead of locked-out. A lot of things have also been removed. There is no adjustment for AGC, just on or off. Copy/paste channel is gone. The non-radio location-based GPS features, PIO and Dangerous Road/Dangerous Crossing, have been removed as well as Review Location and GPS Display modes. Priority Plus, EDACS SCAT System support, the P25 LP filter, cloning, the trunking activity indicators, auto search and store (in favor of Discovery Modes), and the Service Searches have been removed. CC-Only, quick keys, startup keys, and number tags for the custom searches are gone. Close Call Autostore, override, and tone/code search have been removed. "Function Lock" is also gone. The km/m GPS option has been removed probably because the RR database (included) is use for location information and it uses "miles". Private Systems and Key-Safe mode have disappeared as well. Some of the quirks. You can't charge the batteries with the radio on. You have to turn it off or, (recommended), charge them in an external charger. There is no "0" charge time setting for those of us who never charge the batteries in the scanner and want to use USB power. The alert LED and ring only (and always) stay on for 5 seconds. The internal battery used for the clock will go dead in about 7-10 days if you don't use the scanner and it will charge only when the scanner is powered on. P25 'Auto' mode doesn't seem to be functional. Batteries are required in the BCD436HP for the recording and replay features to work. Search with Scan is now treated like the database or a Favorites List so it has to be enabled the same way in 'Select Lists to Monitor', but it's also treated like a System so it has to be enabled with another setting (??). Then each Custom Search department or the 'Hits with Scan' department also has to be enabled. The 'Hits with Scan' department isn't accessible in the Close Call menu so you have to hold on the 'Search with Scan' system in scan mode, then hold on the 'Close Call Hits' department (why it has a different name in scan mode is also a mystery), and then hold on a channel to scroll to each of the channels. Analyze Mode, similar to the HP-1, will be out (soon??) and will have a trunked system analyzer that includes a reception status graph, an activity chart and log, LCN activity monitor, and talkgroup converter. It should also have a LCN channel finder, a bandscope, a frequency power plot, and a raw data output. There are better antennas out there to use than the one that comes with the scanner. The stock whip on the BCD536HP isn't fabulous. RS has the Center-Loaded Telescoping Whip for $15 - better for VHF/UHF. The 800MHz Scanner Antenna for $25 - 100% better for 700+ MHz. You may be able to find others on the web but RS is (was) convenient so you can buy it and take it back in the same day if you don't like it. Read the reviews for each at the site. You have the included SMA to BNC adaptor with the BCD436HP. Paul Opitz (Upman), at Uniden, was generous with working samples to help me write this manual, and, thanks to the many people who have posted their valuable insight on the Radio Reference forums and in the beta test Yahoo groups. An overview of the features can also be viewed at my Trunking Radio Comparison Chart page online. It is also recommended that you download and install the latest firmware update for the scanners using the Sentinel software if you don't have it. I hereby absolve myself from anything that happens to anyone or the scanner as a result of the information you will be reading. I have tried the best I can to make sure everything is accurate here but if I missed a step or you see something that's obviously wrong, please email me. Enjoy. |

![]()
| Main Features | Contents |
|
No Programming Required - Factory programmed micro SD card for all known radio systems in the US and Canada. The database is updatable with the Sentinel software and Uniden updates the main database weekly. |
|
Scan by Location - Allows you to set location(s) by zip/postal code or GPS coordinates for instant reception. The Auto-locate feature will find your location based on local trunked systems if you don’t know your zip code. |
|
Favorites Scan - Allows you to organize your Systems into Favorites Lists. The scanner can scan multiple Favorites Lists and the Full Database at the same time. |
|
4 GB micro SD card - For storing Favorites Lists, Profiles, all of your settings, Discovery sessions, and recording sessions. |
|
Location Based Scanning - Connect to a GPS receiver (not included) for precise system selection and continuing reselection when you travel. The scanner can automatically Avoid and Unavoid Trunked Sites and Departments in Systems based on your current location as provided by an external GPS unit. |
|
Range Control - Lets you set how far out from your current location the scanner will search for Channels in Favorites Lists and the Database. Location precision for Departments and Sites that allows you to define a location and range using rectangles instead just of a single circle. |
|
Wi-Fi Dongle (BCD536HP Only) – With a (future) Wi-Fi app to connect your iPad/Android/Tablet/computer to remotely control the scanner. |
|
Trunk Tracker V Operation - Scans APCO 25 Phase 1 and Phase 2, X2-TDMA, Motorola, EDACS, (EDACS Provoice, with $50 upgrade key), and LTR Standard trunked systems, as well as conventional analog and P25 digital channels. Conventional Digital Mobile Radio (DMR), MotoTRBO Capacity Plus, and MotoTRBO Connect Plus Trunked Radio Systems are also available with a paid upgrade key. |
|
APCO 25 Phase I and Phase II Support - Allows you to receive transmissions with these decoding protocols. |
|
Multi-Site Trunking - Lets you program the scanner to share trunked system IDs across multiple sites without duplicating IDs. |
|
P25 One-Frequency Trunking - The scanner can follow individual talk groups on P25 single-frequency systems that use both NAC and TGID’s for squelch control and user identification. |
|
Control Channel Only Scanning - With Motorola trunking frequencies, you do not have to program voice channel frequencies. |
|
Instant Replay - Plays back up to 240 seconds (4 minutes) of the most recent transmissions. |
|
Audio Recording - Capture transmissions for later playback. |
|
Encryption Muting - APCO P25 encrypted voice is muted automatically. |
|
Custom Alerts - You can program your scanner to alert when you receive, a Channel or Unit ID, a Close Call hit, an ID is transmitted with an Emergency Alert, or a Tone-Out hit. For each alert in the scanner, you can select from 9 different tone patterns, 15 volume settings, 7 LED colors, and 3 flash patterns. |
|
Multicolor LED Alert - The alert LED with 7 colors, Blue, Red, Magenta, Green, Cyan, Yellow, or White, can be used with your Custom Alerts. |
|
Trunking Discovery - Monitors system traffic on a trunked radio system to find unknown IDs and can automatically record audio from and log new channels for later review and identification. |
|
Conventional Discovery - Searches a range of frequencies to find unknown frequencies and can automatically record audio from and log new channels for later review and identification. |
|
Scan by Service Types – Scan your channels by Service Type i.e. Fire, Police, Railroad, etc. |
|
Analyze Mode - Similar to the HP-1 will have a trunked system analyzer that includes a reception status graph, an activity chart and log, LCN activity monitor, and talkgroup converter. It should also have a LCN channel finder, a bandscope, a frequency power plot, and a raw data output. |
|
Scan Speed – 85 channels per second. |
|
Search Speed – 80 steps/sec. except for 5 kHz steps. 250 step/sec. for 5 kHz steps. |
|
Multi-Level Display and Keypad light - Makes the display and keypad easy to see in dim light with three light levels. |
|
Temporary or Permanent Avoid - For Systems, Sites, Departments, Channels, Search Frequencies, Close Call hits, and Search with Scan Departments. |
|
System/Channel Number Tagging - Number tags allow you to quickly navigate to a specific Favorites List, System, or Channel. |
|
Start-up Configuration - You can program each of your Favorites Lists with a Startup Key (0-9) so that when you power up the scanner and press the key number, just those Favorites Lists assigned to the key will be enabled for scan. |
|
Close Call© RF Capture Technology - Lets you set the scanner so it detects and provides information about nearby radio transmissions. Close Call Do-not-Disturb checks for Close Call activity in between channel reception so active channels are not interrupted. |
|
Broadcast Screen - Allows the scanner to ignore hits on known broadcast frequencies including pager frequencies in search and Close Call modes. You can also program up to 10 custom frequency ranges that the scanner will ignore. |
|
Fire Tone-Out Standby/Tone Search - Lets you set the scanner to alert you if a two-tone sequential page is transmitted. You can set up to 32 Tone-Outs. The scanner will also search and display unknown tones. |
|
PC Programming – Use the Sentinel software to manage your scanners Profiles, Favorites Lists, Databases, and firmware updates. |
|
Analog and Digital AGC - Helps automatically balance the volume level between different radio systems. |
|
Priority/Priority DND Scan - Priority channels let you keep track of activity on your most important channels while monitoring other channels for transmissions. Priority DND checks priority channels only between transmissions. |
|
Priority ID Scan - Allows you to set priority to talkgroup IDs. |
|
Intermediate Frequency Exchange - Changes the IF used for a selected channel/frequency to help avoid image and other mixer-product interference on a frequency. |
|
Individual Channel Volume Offset - Allows you to adjust the volume offset for each Favorites List channel. |
|
Configurable Band Defaults - Allows you to set the step (5, 6.25, 7.5, 8.33, 10, 12.5,15, 20, 25, 50 or 100 kHz) and modulation (AM, FM, NFM, WFM, or FMB) for 31 different bands. |
|
Repeater Find - Allows the scanner to try to switch to the repeater frequency if an input frequency is found. |
|
Adjustable Scan/Search Delay/Resume - Set a delay up to 30 seconds or a forced resume up to 10 seconds for each channel or search. |
|
Data Naming - Allows you to name each Favorites List, System, Site, Department, Channel, ID, Location, Custom Search, and SAME group, using up to 64 characters. |
|
Duplicate Input Alert - Alerts you if you try to enter a duplicate name or frequency already stored in the scanner. |
|
Quick Keys - You can assign up to 100 Quick Keys for each of your Favorites Lists, Systems, and Departments or Sites. |
|
10 Custom Searches - Lets you program up to 10 custom search ranges. |
|
Search Avoids - You can temporarily Avoid up to 250 frequencies and permanently Avoid up to 250 frequencies in any Search Mode or Close Call Mode. |
|
Search with Scan Operation - Lets you include Custom Search ranges during scan operation. |
|
3 Search Keys - You can assign 3 of the number keys to start a Custom Search, Close Call, or Tone-Out Search. |
|
Quick Search - Allows you to start searching at the displayed frequency, or enter a frequency and start searching. |
|
SAME Weather Alert/Priority - Lets your scanner alert you when a SAME weather alert is transmitted on a NOAA weather channel. You can also set a weather channel as a priority channel. |
|
Built-in Battery Charger (BCD436HP only) - Allows you to charge the batteries in the scanner from any USB port with the scanner off. |
|
DIN-E and ISO Vehicle Mountable (BCD536HP Only) - Using the optional DIN-E sleeve or a standard ISO technique, the scanner can be easily mounted in most vehicles. |
![]()
| Understanding CTCSS/DCS/NAC | Contents |
|
Continuous Tone Coded Squelch System (CTCSS) and Digital Coded Squelch (DCS) are two methods used to prevent interference by other radio communications. Your scanner can receive transmissions that use these codes (or more commonly referred to as tone codes). CTCSS and DCS systems all use some form of coded squelch. Coded squelch techniques involve the transmission of a special 'code' signal along with the audio of a radio transmission. A receiver with coded squelch only activates when the received signal has the correct 'code'. This lets many users share a single frequency, and decreases interference caused by distant transmitters on the same channel. In all major metropolitan areas of the United States, every available radio channel is assigned to more than one user. Public safety radio systems on the same frequency are usually set up at
a distance of 40 miles apart, or more. This means that you may hear
transmissions from a distant system when your local system is not
transmitting. By programming the CTCSS tone for a local channel the scanner
will not stop on transmissions from the distant system. With few exceptions,
such as the VHF Aircraft and Marine bands, almost every other VHF or UHF radio
system uses some form of coded squelch. By far, CTCSS is the most popular mode
among non-trunked systems. |
![]()
| Understanding Trunking | Contents |
|
Trunking systems let a large group of 2-way radio users (or even different groups of 2-way radio users) efficiently use a set of frequencies. Instead of selecting a specific frequency for a transmission, the user’s radio selects a programmed trunking bank in the system when that user presses their PTT (push to talk) button. The trunking system automatically transmits the call on the first available frequency, and also sends (on a different frequency called a Data or Control channel) a code that uniquely identifies that transmission as a talkgroup ID (or just ID.) So when you are trunktracking a system, you are listening to active IDs transmitting in the system (each using the first available frequency in the system.) Trunking systems in general allocate and use fewer frequencies among many different users. Since the trunking system might send a call and its response on different frequencies, it is difficult to listen to trunked communications using a conventional scanner. These scanners let you monitor the control channel frequency so you can hear calls and responses for users and more easily "follow" conversations than with a conventional scanner. The scanners follow these types of systems: |
|
DMR -
Tier I/II/III
(with DMR upgrade key) |
P25 Standard |
|
When you program Motorola/P25 and EDACS system frequencies into the scanner, one frequency is used as the control (or data) channel, and the rest are voice frequencies shared by all the users. There may be 3 or 4 frequencies assigned as (primary or alternate) control channels but only one control channel will be active at a time. These scanners will allow you to program just Motorola/P25 control channels into the trunking system and the voice channels will automatically be found (but not programmed). EDACS systems need all the frequencies for the system programmed and in the correct LCN (Logical Channel Number) order. Motorola systems are limited to a maximum of 28 frequencies per system or site. Ericsson EDACS systems are limited to 25 frequencies per system or site. Motorola and EDACS systems can be either analog, digital, or mixed (digital and analog talkgroups). Mixed Motorola systems should be programmed as Motorola systems and not P25 digital systems. That way the channel options will allow you to select if it is digital or analog.
LTR systems work a little differently. LTR systems
typically do not have a dedicated control channel. This type of system
encodes all trunking information as digital subaudible data that accompanies
each transmission. The frequencies also have to be in LCN (Logical Channel
Number) order or the correct 'slot' for the system to trunktrack properly.
Each repeater has its own controller, and all of these controllers are
synchronized together. Even though each controller monitors its own channel,
one of the channel controllers is assigned to be a master that all controllers
report to. Each of these controllers sends out a data burst approximately
every 10 seconds so that the subscriber units know that the system is there.
This data burst is not sent at the same time by all the channels, but happens
randomly throughout all the system channels. LTR systems are limited to 20
frequencies per system.
It's wise to program any suspected DMR frequency in a conventional system to
show color code, slot 1 or 2, and which 'flavor' you have; DMR, Cap+, Con+, or
DT3.
|
|
|
Conventional Digital Mobile
Radio (DMR) single site digital
conventional frequency with low traffic.
The number of time slots used will determine if it is simplex or duplex.
Adding repeaters can increase coverage and expand capacity to up to 200 users
per repeater. |
|
IDs are what you see instead of frequencies when you monitor a trunking system. See also Entering IDs. |
|
Motorola IDs come in two formats: Type I and Type II. Each format displays and uses talk group IDs in slightly different ways. Type I/II hybrid systems use both fleet-subfleet and 5-digit formats for talk group IDs. |
|
|
|
|
EDACS IDs come in two formats: AFS and Decimal. |
|
|
|
|
I-Call IDs (or Private IDs) are direct unit-to-unit transmissions that are not heard by other system users. |
|
Unit IDs (or Radio IDs) are 7 or 8 digit numbers identifying individual radios. Note: To view unit IDs you have to turn the option on in the Display Options menu. |
|
LTR IDs are in the format A-HH-UUU where A is the area code (0 or 1), HH is the home repeater (01-20), and UUU is the user ID (000-254). |
|
Radio Reference.com has an excellent page explaining the various types of trunking systems in more detail here. |
![]()
| Understanding the Memory | Contents |
|
All of the information contained in the scanner is stored on a micro SD card supplied with the scanner. This includes Profiles, Favorites Lists, all the radio settings, and the Radio Reference database.
Profiles The first time you use the scanner to set a location you will start to setup a profile. Only one profile at a time can be used in the scanner. You can create multiple profiles for different locations, Favorites List selection, or scanning preferences. The Sentinel software allows you to download your profile from the scanner, edit, save, and create new profiles to upload them back to the scanner. Profiles also hold your Favorites Lists settings (not the actual lists) for monitoring and uploading to the scanner. If you delete a profile (in the software), your Favorites Lists will still be there. When you create a new profile, you can select which Favorites Lists will be associated (enabled or disabled) with the new profile.
Favorites Lists Favorites Lists will allow you to store channels you find when you are scanning from the Full Database (the easiest way). They can contain channels from trunking systems and conventional systems. You can also manually add systems, (not single sites), departments and channels into Favorites Lists from the database as well as program new systems, departments, sites, and channels with the Sentinel software. You can save up to 256 different lists in the scanner (and software) and associate them with any or all of your profiles. You can monitor one or more lists at a time and/or the Full Database. You can also export you lists to a file to share them. Deleting a profile will not delete the lists associated with a profile. However, deleting a Favorites List will delete it from all profiles.
Systems Departments
Trunking
Sites |
![]()
| Contents |
|
Organizing your Quick Keys will be part of the planning. You will have to figure out which QK's to assign to your Favorites Lists, Systems, Departments, and Sites so you can scan them without a table of contents and with some sort of logic you can remember. Enabling/disabling QK's is not the same thing as Avoiding or Unavoiding Favorites Lists, Systems, Department and Sites. Favorites
List Quick Keys (FLQK) System
Quick Keys (SQK) Department/Site
Quick Keys (DQK) Advice: Assigning a QK
to a FL is a good idea but don't go overboard and assign QK's to all your 40
Systems, 125 Departments, and 300 Sites if you don't need to. Only assign QK's
to what you may want to turn on or off. If you are always going to scan a
Department or Site, leave it at the default (no QK) which will always
enable it for scan. Using locations along with Location Control can also turn
Departments or Sites on and off. If you are still bent on shutting stuff on and off,
try creating a FL for some stuff on, and another for some stuff off. There's
plenty of room on the SD card. To sum it up, don't make QK's any more
complicated than they have to be. Search
Quick Keys |
![]()
|
You can power your BCD436HP using three alkaline or
rechargeable AA batteries. This is no switch for battery selection. 1. Install 3 AA batteries, matching the polarity
symbols (+ -). When battery icon flashes and the scanner beeps
every 15 seconds, replace or recharge the batteries. The scanner has a built-in circuit that lets you
recharge rechargeable batteries while they are in the scanner. Plug the USB cable into the scanner when the
scanner is off and "Battery
Charge" - "Start Charging? Yes = "E"/ No = "." will display. Press
E/yes. |
![]()
| Contents |
|
The USB jack is the lower jack located under the rubber flap on the right side of the BCD436HP and on the front of the BCD536HP under the E/yes button. When you connect the USB cable to the scanner when
the power is on you will see "USB Cable Detected Select USB Mode" - "Mass
Storage = "E" or Serial Port = ".". The serial mode will be used for audio streaming,
raw data output, and serial control modes in future software from 3rd party
developers. Also used for operation of hand-held without batteries. The USB cable can also be used to power the BCD436HP when the batteries are removed. Plug the USB cable into the BCD436HP with no batteries and "No Battery" will display. Press and hold the power button to turn on the scanner. Press the power button again to turn the backlight on. Press .no to select "Serial Port". |
![]()
| Contents |
|
Function
Menu |
![]() BCD436HP |
Scroll Control
GPS
USB
|
![]()
|
|
(BCD436HP)
Press
and hold
Press
the scroll control again to close the volume level (or let it disappear after
10 seconds). Press
Func then press the scroll control to
display the squelch level. Turn the scroll control counter-clockwise all the
way then clockwise until the noise stops, then one notch more. Press the
scroll control again to close the squelch level. |
|
(BCD536HP) Rotate VOL clockwise and set the volume to around 10 o’clock. Rotate the SQ knob counter-clockwise all the way, and then rotate the VOL knob to find a comfortable volume level. Rotate the SQ clockwise until the noise stops, then one notch more. |
|
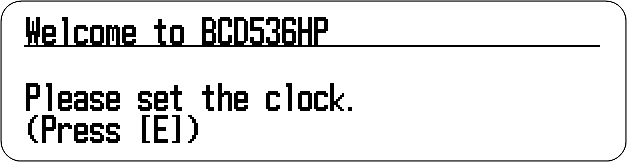
The first time you turn on your scanner it will prompt you to set the clock. See Setting the Clock. |
|
|
|
Note: Both of these scanners have a Real Time Clock (RTC) onboard powered by an internal battery (not the AA’s with the 436). The internal battery will charge only when the scanner is powered on. It takes about 50 hours to trickle the internal battery up to a full charge, which will last for over a week. If the internal battery is depleted, you'll be prompted to enter the time upon power-up. To begin scanning right away, press the Zip button to select your country and zip/postal code (See Data Naming to enter postcode). The scanner will load channels for your area from the database and start scanning. |
![]()
| Contents |
|
The Menu key lets
you select options to set up and use the scanner. To select a menu item,
rotate the scroll control. Rotate right for down and left for up. |
![]()
| Contents |
|
Name any Favorites List, System, Site, Department, Channel, Location, Custom Search, Recording Session, Tone-Out, or SAME group with up to 64 characters. |
|
To Enter a Character, turn the scroll control to select the character you
want. See also Characters. |
![]()
| Contents |
|
|
|
|
BCD536HP |
BCD436HP |
|
BCD536HP |
|
|
Power/VOL/
|
Turns the scanner on/off and adjusts the volume. |
|
Press to toggle backlight intensity. |
|
|
Press Func then Vol to view P25 Adjustment Mode. Press Vol to exit. |
|
|
SQ
|
Turn to adjust the squelch. |
|
Press to toggle Close Call Modes. |
|
|
Press and hold to enable Close Call Only Mode. |
|
|
Press Func then SQ to start Fire Tone-Out Standby/ Search Mode. |
|
|
Scroll Control/ |
Press to enter Function Mode for 3 seconds. |
|
Press to select a menu item or save an entry in Menu Mode. |
|
|
Turn to select a menu item in Menu Mode. |
|
|
Press then turn to set decode threshold in P25 Adjustment Mode. |
|
|
Turn to select characters with Data Naming. |
|
|
Turn to select Scan/Search direction and to continue Scan/Search in Scan/Search Modes. |
|
|
Turn to scroll Channels or Frequencies in Hold Modes. |
|
|
Turn in Department Pause to scroll Departments. |
|
|
Turn in System Pause to scroll Systems. |
|
|
Turn in Site Pause to scroll Sites in current System. |
|
|
Turn in Search Pause to select Custom Searches to enable in Search Mode. |
|
|
Turn to select next/previous recording in Replay Mode. |
|
|
Turn to resume Close Call search in Close Call Only Mode. |
|
|
Turn to start a Quick Search in Close Call Hold Mode. |
|
|
Turn to select next Weather Channel in Weather Scan. |
|
|
Turn to select Tone-Outs in Tone-out Standby/Search Mode. |
|
|
Avoid
|
Press to exit all menus and return to previous mode. |
|
Press to toggle Channel/Frequency Avoid status in Receive/Hold Modes. |
|
|
Press to toggle Avoid status in System, Department, or Site Pause. |
|
|
Press Func then Avoid to review all Scan Avoids in current Favorites List or Database in Scan Hold Mode. |
|
|
Press Func then Avoid to review all Search Avoids in Search Hold Modes. |
|
|
Press and hold to clear all Department/Channel Avoids in the current System in Scan Hold Mode. |
|
|
Press and hold to clear all Search Avoids in Search Hold Modes. |
|
|
Press Func then press and hold Avoid to clear all Avoids in the current Favorites List or Database in Scan Hold Mode. |
|
Zip |
Press to enter country-zip/postal code. |
|
Serv |
Press to select Service Types. |
|
Rang |
Press to select Range. |
|
BCD436HP |
|
|
Power/Light/Lock
|
Press and hold to turn the scanner on or off. |
|
Press to use the backlight. |
|
|
Press Func then
|
|
Func |
Press to enter Function Mode for 3 seconds. |
|
Scroll Control |
Press then turn to adjust volume level in Scan Mode. |
|
Press to view battery level. |
|
|
Press Func then Vol turn to adjust the squelch. |
|
|
Press Vol then Func then Vol to view P25 Adjustment Mode. Press Vol to exit P25 Adjustment Mode. |
|
|
Press Func then turn to set decode threshold in P25 Adjustment Mode. |
|
|
Press to select a menu item or save an entry in Menu Mode. |
|
|
Turn to select characters with Data Naming. |
|
|
Turn to select Scan/Search direction and to continue Scan/Search in Scan/Search Modes. |
|
|
Turn to scroll Channels or Frequencies in Hold Modes. |
|
|
Turn in Department Pause to scroll Departments. |
|
|
Turn in System Pause to scroll Systems. |
|
|
Turn in Site Pause to scroll Sites in current system. |
|
|
Turn in Search Pause to select Custom Searches to enable in Search Mode. |
|
|
Turn to select next or previous recording in Replay Mode. |
|
|
Turn to resume Close Call Search in Close Call Only Mode. |
|
|
Turn to start a Quick Search in Close Call Hold Mode. |
|
|
Turn to select next Weather Channel in Weather Scan. |
|
|
Turn to select Tone-Outs in Tone-out Standby Mode. |
|
Avoid |
Press to exit all menus and return to previous mode. |
|
Press to toggle Channel/Frequency Avoid status in Receive/Hold Modes. |
|
|
Press to toggle Avoid status in System, Department, or Site Pause. |
|
|
Press
Func then Avoid( |
|
|
Press and hold to clear all Department/Channel Avoids in current System in Scan Hold Mode. |
|
|
Press and hold to clear all Search Avoids in Search Hold Modes. |
|
|
Press
Func then press and hold Avoid( |
|
Zip/Services |
Press to enter country-zip/postal code. |
|
Press Func then Zip to select Service Types. |
|
BCD436HP and BCD536HP |
|
|
Replay/ |
Press to Replay the last transmissions. |
|
Press Func then Replay to start/stop recording. |
|
|
Press and hold Replay to review recording sessions. |
|
|
System |
Press Func then System to exit all menus and return to Scan Mode. |
|
Press to enter System Pause for 2 seconds then hold on a System in Scan Mode. |
|
|
Double Press System for hold without pause in Scan Mode. |
|
|
Double Press to release System Hold. |
|
|
Press to enter Search Pause for 2 seconds then hold on a Search in Search Mode. |
|
|
Double Press for Search Hold without pause in Search Mode. |
|
|
Press to release Search Hold. |
|
Department |
Press to enter Department Pause for 2 seconds then hold on a Department in Scan Mode. |
|
Double Press Department for hold without pause in Scan Mode. |
|
|
Double Press to release Department Hold. |
|
| Press to enter Search Pause for 2 seconds then hold on a Search in Search Mode. | |
|
Double Press for Search Hold without pause in Search Mode. |
|
|
Press to release Search Hold. |
|
|
Press Func then Department to hold/release Site in Scan Mode. |
|
Channel/Hold/ |
Press to hold/release a Channel, Frequency, CC hit, or Tone-Out. |
|
Press Func then Channel to toggle Modulation for Channel, Site, or Search, in Hold Modes. |
|
|
Press to pause in Replay Mode. |
|
Menu |
Press to enter Menu Mode. |
|
Press to return one level in Menu Mode. |
|
|
Press Func then Menu for Search Menu in Search Mode. |
|
|
Press Func then Menu for Close Call Menu in Close Call Mode. |
|
|
Press Func then Menu for Weather Menu in Weather Scan. |
|
|
Press Func then Menu for Tone-Out Menu in Tone-Out Standby/Search Mode. |
|
Number Keys |
Press to select Favorites Lists in Scan Mode. |
|
Press 0-9 to use Direct Entry in Hold Modes. |
|
|
Press 0-9 to toggle custom searches on or off in Search Mode. |
|
|
Press 0-6 to toggle Close Call bands on or off in Close Call Only Mode. |
|
|
Press Func then 1, 2, or 3 to enable search keys in Scan Hold Mode. |
|
|
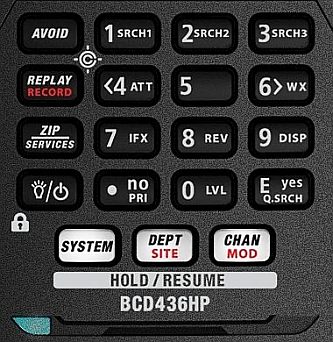
Press <4 to move the cursor to the left when editing text. |
|
|
Press Func then 4(ATT) to toggle channel/search/CC attenuation on/off in Receive/Hold Modes. |
|
|
Press Func then press and hold 4(ATT) to toggle Global Attenuation on/off in Scan Hold or Search Modes. |
|
|
Press
Func then 5( |
|
Press 6> to move the cursor to the right when editing text. |
|
|
Press Func then 6(WX) to toggle Weather Alert Priority in Hold Modes. |
|
|
Press Func then press and hold 6(WX) to enter Weather Scan. |
|
|
Press Func then 7(IFX) to toggle Intermediate Frequency Exchange for a channel/frequency in Hold Modes. |
|
|
Press Func then press and hold 8(REV) to view the repeater frequency in Hold Modes. |
|
|
Press Func then 9(DISP) to toggle 3 Line Display Mode in BCD536HP or Channel Service Type/Unit ID Display in BCD436HP in Scan Hold Mode. |
|
|
Press Func then 0(LVL) to toggle the volume offset for a channel in Scan Hold Mode. |
|
.no |
Press to enter a decimal point for a frequency. |
|
Press to enter an 'i' when entering an I-Call ID. |
|
|
Press to delete current character with Data Naming/Direct Entry. |
|
|
Press twice to delete all characters with Data Naming/Direct Entry. |
|
|
Press twice to enter a hyphen when entering an ID. |
|
|
Press to cancel Confirm? prompt. |
|
|
Press Func then .no(Pri) to toggle Priority Modes. |
|
E/yes |
Press to select a menu item or save an entry in Menu Mode. |
|
Press to edit current Channel in Receive/Hold Modes. |
|
|
Press to add Channel to Favorites List in Receive/Hold Modes. |
|
|
Press to store a blinking CTCSS/DCS/NAC tone in Receive/Hold Modes. |
|
|
Press to store an ID in ID Search mode in Receive/Hold Modes. |
|
|
Press to store a Unit ID in Receive/Hold Modes. |
|
|
Press to 'Quick Store' a frequency in Search Modes. |
|
|
Press Func then E/yes to toggle ID Search Mode on/off in Scan Mode (Favorites Lists Only). |
|
|
Press Func then E/yes to start a Quick Search in Hold Modes. |
|
|
Press to store found tones in Tone-Out Search Mode. |
|
|
Press to select the current Tone-Out menu in Tone-Out Mode. |
![]()
| Contents |
|
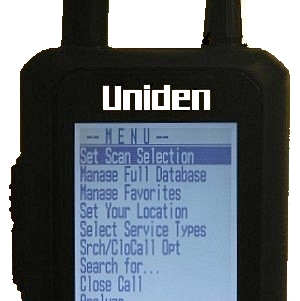
Press Menu then scroll to
Set
Your Location and press E/yes. Note: You may receive distant systems in other states that have a range that overlaps your area when using the database. This is due to the structure of the database. |
|
|
|||
|
|
|||
|
|
|
|
Enter Zip Code This will set the center of a zip/postal code as your location (not your exact location) and a default location range of 20 miles. You can then set the range, edit the location name, and save the location. |
|
|
Select
your country USA or Canada
and press E/yes. |
|
|
Note: You can also press the ZIP button to enter your zip/postal code. |
|
Auto Locate The Auto Locate feature works by trying to monitor any Motorola or P25 system in your area that is also in the Radio Reference Database. The scanner will then set your location based on the system(s) it receives. This will set the center of the discovered radio tower as your location (not your exact location) and a default location range of 30 miles. You can then set the range, edit the location name, and save the location. |
|
|
Press E/yes or .no to accept the location. Press Menu to cancel. |
|
Set Manual Location This will set your exact location. You can then set the range, edit the location name and save the location. |
|
|
Input Latitude -
Using the keypad, enter your
latitude. |
|
Set Up GPS Sets the location format and serial port baud rate. |
|
|
Location Format |
|
|
DMS:DDD˚MM’SS.ss or DEG:DDD.dddddd. |
|
|
Set Serial Port (front and rear ports for the BCD536HP), default is 4800 bps for a GPS device. |
|
|
Off, 4800, 9600, 19200, 38400, 57600, or 115200 bps. |
|
Set Range This setting allows you override the default range setting for your current location to increase or decrease the number of Trunking Sites and Channel Departments you can receive when you are scanning from the Full Database and when you are scanning Favorites Lists with Use Location Control enabled. The default (and recommended) setting is 0 miles. See also Understanding Range. |
|
|
Enter the range (0-50) and press E/yes. |
|
|
Note: (BCD536HP Only) You can also enter your range by pressing the Rang button. |
|
Edit Location This allows you to create, edit, and recall locations. |
|
|
New Location or Saved Location |
|
|
Edit Name See Data Naming. |
|
|
Use Location |
|
|
This will set the location as current for scanning the Database and Favorites Lists with Use Location Control enabled. |
|
|
At Confirm? Press E/yes or .no. |
|
|
Delete Location |
|
|
You can only delete saved locations. The last location set will be retained for use when scanning the Database. |
|
|
At Confirm Delete? Press E/yes or .no. |
|
|
Set Location Information See Set Manual Location. |
|
|
Set Range Enter the range (0-50) and press E/yes. |
|
Save Location This will save the current location, the range, and set the location as current for scanning the Database and Favorites Lists with Use Location Control enabled. |
|
|
See
Data
Naming to name
the location. |
|
1. There are actually two range settings. Your Location range (the RANG button), and the range you can program for each Department or Site. The Range button (I think) is designed for scanning the 'Full Database' where you can't program ranges for Departments and Sites. You can program a range for each Department/Site in Favorites Lists so you will receive Departments/Sites that have a range equal to your Location range plus the programmed range of the Departments/Sites. For example, if your Location range is set to 10 miles and a Department/Site range is set to 30 miles, and that Department/Site is less than 40 miles away from your current location setting, it will be enabled in your Favorites List according to both range settings. 2. The range settings
will only work with Favorites Lists that have
Use Location Control set to On
and
with Departments/Sites that have locations and ranges programmed. |
![]()
| Contents |
|
Make sure you enable the Service Type for the channels
you want to listen to. Each channel can be tagged with a "Service Type" that
allows you to hear specific services such as Fire, EMS, and Police when you
are monitoring the Full Database and/or your Favorites Lists.
The Appendix has a list of Service Types and their
general descriptions. When the scanner displays a Service Type that is not in the Favorite Lists, the scanner will display a "---" indication. |
![]()
| Contents |
|
Press
Menu
then scroll to Display Options and press
E/yes. |
|
|
||
|
|
||
|
|
||
|
|
|
|
Set Mode - Note: (BCD536HP Only) These settings will work only when Set Dimmer is Off and then only at the High intensity. |
|
|
Squelch Determines how the backlight acts with squelch. |
|
|
Off - The backlight stays off when the squelch opens
(default). |
|
|
Keypress |
|
|
Off - The backlight stays off when any key is
pressed (default). |
|
|
Timeout (BCD436HP Only) |
|
|
10
sec - Turns the backlight on for 10
seconds when you press
|
|
|
Set Dimmer (BCD436HP) |
|
|
High, Middle, or Low. |
|
|
Set Dimmer (BCD536HP) |
|
|
Manual (For non-vehicle use) |
|
|
High, Middle, Low, or Off. |
|
|
Auto (For vehicle use) |
|
|
+ Polarity
- If the orange wire gets 12V when you turn on the headlights. |
|
Adjust Contrast This setting controls the displays contrast. |
|
|
Contrast 1-15 |
|
Display Unit ID Allows you view the unit ID of the radio currently transmitting on Motorola, EDACS, and APCO P25 systems. |
|
|
On or Off. |
|
|
Note: (BCD436HP Only) This setting toggles Unit ID Display with Channel Service Type. |
|
|
Set ID Format (Mot/P25) |
|
|
Decimal Format or Hex Format. The default setting is Decimal. |
|
|
Set ID Format (EDACS) |
|
|
AFS Format or Decimal Format. The default setting is AFS. |
|
Set Upside-Down (BCD536HP Only) This allows you to reverse the display so you can mount the scanner upside-down and hear the speaker from the top. The default setting is Off. |
|
|
On or Off. |
|
|
Hold
on any channel and press
Func
then 9(DISP).
|
|
|
|
![]()
|
|
|
|
|
|
|
|
|
|
|
|
|
|
Note: (BCD536HP) not all items will appear in the display in 3-line display mode. |
|
|
|
|
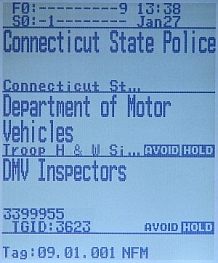
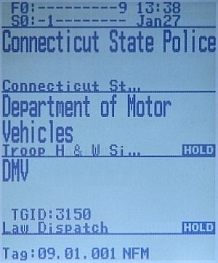
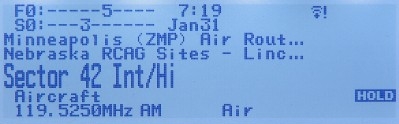
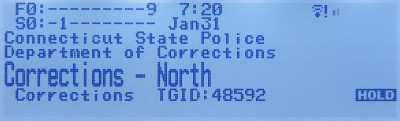
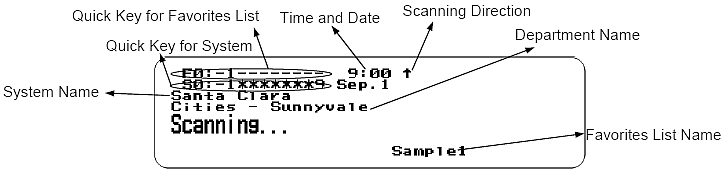
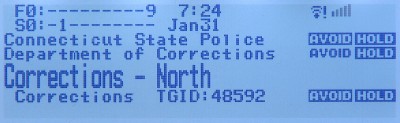
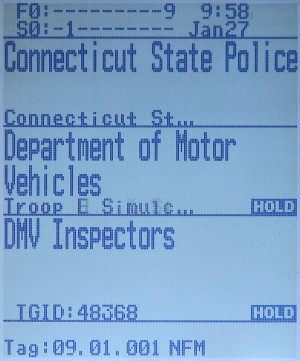
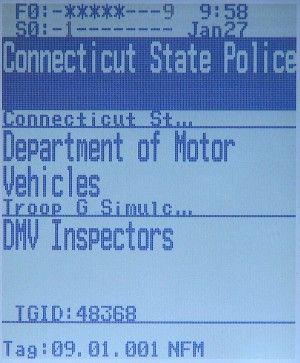
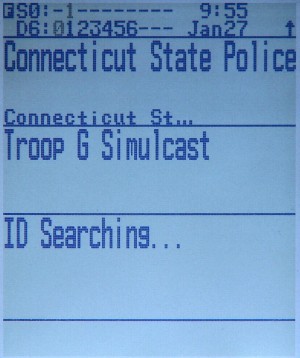
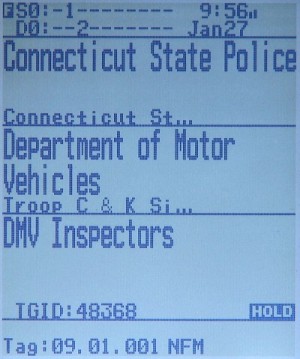
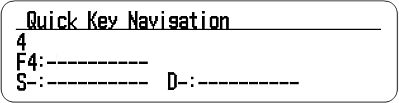
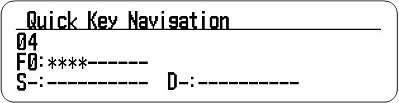
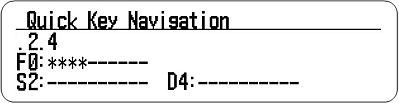
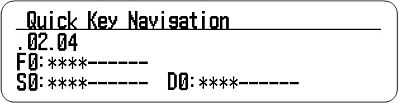
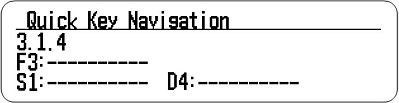
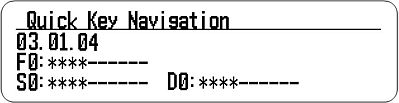
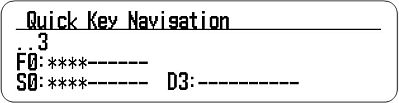
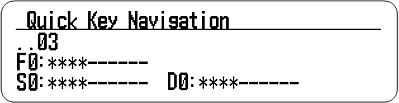
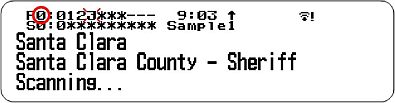
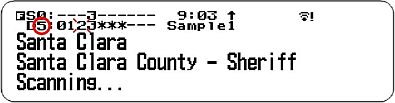
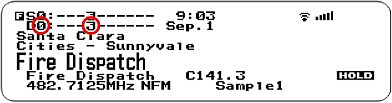
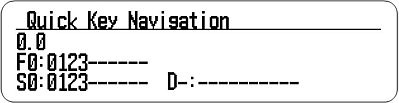
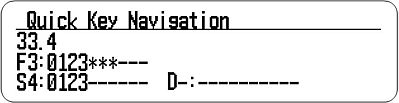
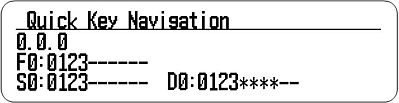
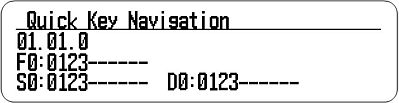
F0-9: shows the first digit of the current Favorites List QK on the left with the blinking second digit on the right in Scan Mode. |
|
|
|
A non-blinking number on the right indicates the QK is enabled waiting to be scanned. |
|
|
A - (dash) means nothing is enabled for, or assigned to the QK. |
|
|
An * (asterisk) means the QK is disabled. |
|
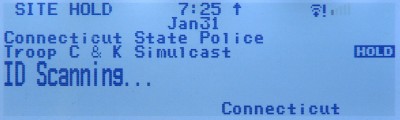
SITE HOLD appears in Site Hold Mode. |
|
|
SEARCH appears in Search Mode. |
|
|
The Time appears. |
|
|
|
|
|
↑ or ↓ appears to show the Scan or Search Direction. |
|
|
GPS appears when connected to a GPS unit. |
|
|
REC appears when Recording. |
|
|
|
|
|
AP appears when connected in Access Point Mode (BCD536HP Only). |
|
|
|
|
|
PRI appears in Priority Mode. |
|
|
|
|
|
S=NN shows the squelch level for three seconds when you turn SQ (BCD536HP Only). |
|
V=NN shows the volume level for three seconds when you turn SQ. |
|
V.VV shows the battery level (in volts) when you press VOL (BCD436HP Only). |
|
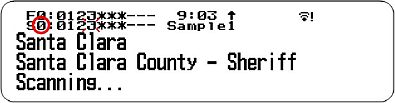
S0-9: shows the first digit of the current System QK on the left with the blinking second digit on the right in Scan Mode. |
|
|
|
A non-blinking number on the right indicates the QK is enabled waiting to be scanned. |
|
|
A - (dash) means nothing is assigned to the QK. |
|
|
An * (asterisk) means the QK is disabled. |
|
D0-9: shows the Department QK (Conventional
system) or Site QK (trunked system) when you press Function in Scan Mode. |
|
|
0-9: shows the Custom Search key status in Search Mode. |
|
|
MMM DD shows the Month and Date (3-line display Mode On). |
|
|
Receive Mode shows the Modulation for the channel/site in Receive/Hold Modes (BCD436HP Only). |
|
shows the Modulation for the channel/site in Function Mode (BCD536HP). |
|
V+/- N shows
Volume Offset for the channel in Receive/Hold Modes
(BCD436HP Only). |
|
IFX appears if Intermediate Frequency Exchange is enabled for the frequency in Receive/Hold Modes. |
|
ATT appears
to show channel attenuation in Receive/Hold Modes.
|
|
P25 appears if the channel is receiving digitalized voice in Receive/Hold Modes (Disp. Unit ID Off-BCD436HP only). |
|
PT0 appears if the channel is receiving Phase II time slot 0. |
|
PT1
appears if the channel is
receiving Phase II time slot 1. |
|
LNK appears when data is received on a voice channel in Receive/Hold Modes (Disp. Unit ID Off-BCD436HP only). |
|
DAT appears when data is received on a control channel in Receive/Hold Modes (Disp. Unit ID Off-BCD436HP only). |
|
ENC appears if the channel is receiving encrypted voice and is muted in Receive/Hold Modes (Disp. Unit ID Off-BCD436HP only). |
|
WX appears if the Weather Alert Priority feature is on. |
|
System Name appears in Scan/Hold/Receive Modes. |
|
Search with Scan appears to show the Search with Scan system in Scan/Hold/Receive Modes. |
|
Avoid/Hold shows System Avoid/Hold status next to System name in Hold/Pause Modes. |
|
Temporary Avoids appear reversed in the display- |
|
Department Name
appears
for a conventional system in Scan/Hold/Receive Modes. |
|
Avoid/Hold shows Department Avoid/Hold status next to Department name in Hold/Pause Modes. |
|
Temporary Avoids appear reversed in the display- |
|
Custom Search Name shows the Custom Search or Close Call Hits department in the Search with Scan system in Scan/Receive/Hold Modes. |
|
Site Name appears for a trunked system in Scan Mode. |
|
Custom Search Name shows in Search Mode (3-line Display Mode Off). |
|
Search Frequency appears in Search Mode. |
|
Modulation appears in Search Mode. |
|
Scanning… appears for a conventional system in Scan Mode. |
|
ID Scanning/Searching… appears for a trunked system in Scan Mode. |
|
Channel Name appears in Receive/Hold Modes. |
|
Avoid/Hold shows
Channel Avoid/Hold status next to Channel name in Hold/Pause
Modes. |
|
|
|
Channel Service Type appears in Receive/Hold Modes (BCD536HP, 3-line Display Mode Off). |
|
TGID appears for a trunked site in Receive/Hold Modes (3-line Display Mode Off). |
|
Tone/Code
for a conventional channel in Receive/Hold Modes (3-line Display Mode Off). |
|
Unit ID appears in Receive/Hold Modes with Disp. Unit ID set to On (3-line Display Mode Off). |
|
Frequency, Mode for a conventional channel in Receive/Hold Modes (3-line Display Mode Off). |
|
Favorites List Name
appears when scanning any Favorites List in Scan/Hold/Receive Modes (BCD436HP). |
|
Full Database when scanning the Full Database in Scan/Hold/Receive Modes (3-line Display Mode Off). |
|
SCR appears if one or more broadcast/custom screen bands are turned on in Receive/Search Modes. |
|
REP appears if Repeater Find is enabled in Receive/Search Modes. |
|
Tag: NN.NNN.NNN
shows Number Tag Info for
a Favorites List in Function Mode (BCD536HP Only). |
![]()
| Contents |
|
Press
Menu then scroll to Settings
and press E/yes. |
|
|
|||
|
|
|||
| Upgrade | Replay Options | Using the Keypad Lock | |
|
|
|
|
|
Adjust Key Beep Allows you to turn the key beep on or off and adjust the volume level. Auto sets the alert beep to the master volume level. |
|
|
Off, Level 1-15, or Auto |
|
Set Clock Sets the clock for the display and the default tag for recordings. |
|
|
Set Date |
|
|
Set Year Enter the year
(2013-2099). |
|
|
Set Time |
|
|
Set Hour Enter the Hour
(0-23). |
|
|
Set Time Zone |
|
|
Scroll to your time zone. |
|
|
Daylight Saving Advances the clock one hour during DST when On. |
|
|
On or Off |
|
Upgrade Allows you to enter upgrade keys for Provoice and DMR. |
|
|
Set Battery Save Turns off RF power for 1 second and turns it on 300 ms to extend the battery life in Channel Hold Mode for a Conventional System (without Priority Scan), and in any Search Hold mode when there is no transmission over 1 minute. |
|
|
On or Off |
|
|
Set Charge Time - 1-14 (hours). |
|
|
Set Battery Low |
|
|
Set Alert |
|
|
Set Alert Tone - 640, 780, 920, 1060, 1200 (Hz). |
|
|
Set Alert Interval - 1-60 (seconds). Default is 15 sec. |
|
|
Set Alert Volume - 1-15 or Auto. Default is Auto. |
|
|
Set Voltage
Sets when the low
battery alert goes off. |
|
Band Defaults This allows you change the ‘Auto’ values you can select while programming frequencies, searches, etc. to whatever you feel Auto should be for each band (vs. the radio defaults). Since all of the step and modulation settings default to Auto, this allows you to skip those settings when programming. See also Default Bands. |
|
|
Scroll to each band you wish to edit and press E/yes. |
|
|
Set Modulation |
|
|
AM, NFM, FM, WFM, or FMB (Broadcast). |
|
|
Set Step |
|
|
Auto, 5, 6.25, 7.5, 8.33, 10, 12.5, 15, 20, 25, 50, or 100 kHz. |
|
Auto Shutoff Allows you to set the scanner to shut off after a set time. |
|
|
Off, 5, 10, 15, 30, 45 min, 1, 2, 3, hours. |
|
|
Set Replay Duration How far back in real time recordings are kept. |
|
|
Off, 30, 60, 90, 120, 150, 180, 210, or 240 sec. |
|
|
Review Recordings You can also press and hold Replay to review recordings. |
|
|
Recording Session To play sessions you have to enable recording by pressing Func then Replay. |
|
|
Play Session |
|
|
Turn
the Scroll Control to select recordings. |
|
|
Delete Session |
|
|
At Confirm Delete? Press E/yes or .no. |
|
|
Rename Session See Data Naming. |
|
Restore Options Allows you to clear all user data (full reset) or reset just profile settings to default. |
|
|
Clear User Data |
|
|
(Full Reset) will delete all Favorites Lists, locations, reset all profile options to default, clear all Avoids, delete all recording sessions, all discovery logs, and all weather event records. |
|
|
Note: Pressing and holding 2, 9, and Dept when you power on the scanner will also clear all user data. |
|
|
Reset User Settings |
|
|
Will only reset all profile settings and Favorites List will be saved. |
|
See Scanner Info This will show you how much memory is in use, the firmware version, and scanner serial number. |
|
Using the Keypad Lock (BCD436HP Only) The only
keys/knobs that work when the keypad is locked are Channel for Hold Mode,
Func,
|
|
|
Press Func then
|
![]()
| Contents |
|
The Wi-Fi dongle allows you to
connect to the scanner wirelessly and control your scanner with the remote
software. |
|
|
|
Infrastructure Mode is used to connect to a existing wireless network address (like a router). With this mode, all you may need to do is a set a password. |
|
|
Note: A router must be broadcasting its SSID for the initial setup. See your router's manual to temporarily enable SSID broadcasting. You can then turn it off after setup. |
|
Access Point Mode is used to connect laptops and smart devices directly to the scanner. The scanner will look for wireless networks. |
|
|
|
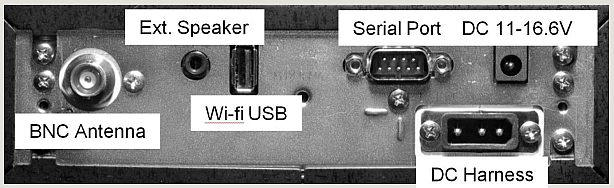
Make sure the Wi-Fi dongle is connected to the USB port behind
the scanner. |
|
|
Show Wi-Fi Information |
|
|
Shows the IP address, MAC number, and version when connected. |
|
|
Set Connection |
|
|
Off Not connected. |
|
|
Infrastructure Mode – routers etc. The scanner will look for networks. |
|
|
Select AP |
|
|
Select the access point with the encryption type. |
|
|
Input Password See Data Naming. |
|
|
Access Point Mode – Laptops, Smart devices etc. |
|
|
Input SSID |
|
|
Enter (or use default) name of connection. See Data Naming. |
|
|
Select Security |
|
|
Open, WEP, or WPA/WPA2. |
|
|
Input Password See Data Naming. |
|
|
Reset to Factory |
|
|
At Confirm? Press E/yes or .no. |
![]()
| Planning Favorites Lists | Contents |
|
A Profile contains all your configuration settings as well as your Favorites Lists and settings, Systems, Avoids, etc., and is a complete image of what is in your scanner. Other settings such as range, service types selected, enabled Favorites Lists, weather settings, display and audio settings also define a profile. Remember that all Favorites Lists are common to all profiles. Enabling and disabling Favorites Lists within a profile is part of defining a profile. Deleting a profile will not delete the lists associated with a profile. However, deleting a Favorites List will delete it from all profiles. You automatically start to create a profile once you enter your location. If you create a new profile in the software, your Favorites Lists will be included (but not enabled) with the new profile. The scanner only holds one profile at a time. Others can be created and uploaded to the scanner with the Sentinel Software.
Startup Keys
Number
Tags
Alerts
Worksheets |
![]()
| Manage Favorites Lists | Contents |
|
Favorites Lists hold all your Systems, Sites, Departments, and Channels. You should assign a Quick Key to every Favorites List to quickly enable or disable the list. |
|
New Favorites List/List Options Press Menu then scroll to Manage Favorites and press E/yes. |
|
To Create a New Favorites List scroll to New Favorites List and press E/yes. |
|
To Edit a Favorites List scroll to the
Favorites List and press
E/yes. |
|
|
|||
|
|
|||
|
|
|||
|
|
|||
|
|
|||
| Information | |||
|
Review/Edit System See Programming Systems. |
|
Set FL Quick Key This assigns a QK to the Favorites List and will scan the list when the key is enabled. You can only use a FL QK once. The default setting is . (no QK). If you don’t assign a QK to a Favorite List, it will always be scanned unless you turn it off in Select Lists to Monitor. |
|
|
Scroll to the QK number (0-99 or . for no QK). |
|
|
Note: Pressing the first number of a 2-digit QK will get you closer, 1 for 10, 2 for 20, etc., then scroll to second digit. |
|
Set FL Number Tag This allows you to number a Favorites List so you can access it quickly from Channel Hold Mode. The default setting is no number tag (blank). See also Using Number Tags. |
|
|
Enter the number tag (0-99) (Press .no to clear display). |
|
Set FL Startup Key This allows you to turn on the scanner with the Favorites List enabled for scan. The default settings are all keys Off. See also Using Startup Keys. |
|
|
Scroll to each key (0-9) and press E/yes to enable. Press Menu to save. |
|
Use Location Control This enables Location Control for the Favorites List. The default setting is Off. See also Understanding Location Control. |
|
|
On or Off |
|
Location Control allows you to enable or disable channels scanned in a Favorites List based on your location. Actually, it enables/disables Sites and Departments in Favorites Lists (as long as they have locations programmed) based on your current location and location range settings. Location Control is always enabled when scanning Sites and Departments from the Full Database. Location Control can also save you the task of assigning, remembering, and enabling/disabling QK's to your Departments and Sites. To use Location Control, you have to enable it for each Favorites List (default is Off). You also need to have locations programmed for Sites and Departments in each list (you can’t program a location for a system). With 'Use Location Control' set to On,
the scanner only sees Departments/Sites with programmed locations. Any
Department/Site with no location information programmed will not be scanned.
With 'Use Location Control' set to Off, the scanner will enable all Sites and Departments in your Favorites List no matter what the location range or Site/Department range is set to. You don’t need a GPS to scan by
location if all of the following apply: |
|
The scanner then compares your location data with Site and Department data to determine which channels to scan. Conceivably, you could program everything you want to hear into one Favorites List and scan just by selecting locations rather than enabling/disabling lists. If you are traveling long distances hooking up a GPS device would be a better way to go. |
|
Review Avoids This allows you to review
all Avoids for the Favorites List. Temporary Avoids appear reversed in the
display- |
|
|
Scroll to each entry and press E/yes to Stop Avoiding. |
|
Stop All Avoiding This will Stop Avoiding all Channels, Departments, and Systems in the Favorites List. See also Clear All Scan Avoids. |
|
|
At Confirm? Press E/yes or .no. |
|
Add Current dB Channels This allows you to add all channels enabled for scan to the Favorites List. This good to use after you have optimized the Full Database when selecting a location. |
|
|
At Confirm? Press E/yes or .no. |
|
|
Notes: 1. Any Avoided Systems, Sites, Departments, or Channels will not be added. |
|
|
2. When adding channels from the Full Database, only channels that are inside the set location range, and from the selected Service Types are added to the new list. |
|
|
3. When adding channels from a Favorites List that has ‘Use Location Control’ set to On, only channels that are inside the set location range, and from the selected service types are added to the new list. |
|
|
4. When adding channels from a Favorites List that has 'Use Location Control' set to Off, only channels that are from the selected service types are added to the new list. |
|
|
See Data Naming. |
|
|
At Confirm Delete? Press E/yes or .no. |
|
Information This will show you the file size and number of Systems in the list. |
![]()
| Contents |
|
Note for Motorola/P25 systems: If you are
not sure if the system is Motorola or P25, look at the system type in the
RR database for your system. Only those
systems tagged as "Project 25 Phase I or Project 25 Phase 2" are Project
25 systems. Any system type that includes the word "Motorola"
should be programmed as a Motorola system, even if it uses some or all
digital channels. |
|
New System/System Settings Press
Menu then scroll to Manage Favorites
and press E/yes. |
|
|
To Create a New System scroll to
New System and press
E/yes. |
|
|
See also
Understanding DMR for DMR systems. |
|
|
To Edit System Settings scroll to the System and press E/yes. |
|
|
See Data Naming. |
|
Edit Unit IDs Disp. Unit ID must be set to On in the Display Options menu to view Unit IDs. The default setting is Off. |
|
|
Note: You can also save any Unit ID in the display by pressing E/yes. |
|
|
New Unit ID/Edit Unit ID |
|
|
Enter the ID and press E/yes. |
|
|
Edit Name See Data Naming. |
|
|
Set Alert Tone |
|
|
Alert 1-9 or Off. |
|
|
Set Level |
|
|
Level 1-15 or Auto (the master volume level). |
|
|
Set Alert Light |
|
|
Set Color |
|
|
Off, Blue, Red, Magenta, Green, Cyan, Yellow, or White. |
|
|
Set Pattern |
|
|
On, Slow Blink, or Fast Blink. |
|
|
Delete Unit ID |
|
|
At Confirm Delete? press E/yes or .no. |
|
Copy System Copying a system will copy all Sites, Departments, Channels, and settings including QK assignments into the current Favorites List. |
|
|
See Data Naming to name the new system. |
|
|
At Confirm Delete? press E/yes
or .no. |
|
Press Menu then scroll to Manage Favorites
and press E/yes. |
|
|
|
|
|||
|
|
Set Status Bit (Motorola Type II Only) |
||
|
|
Set End Code (Motorola Type II Only) |
P25 NAC Option (P25 One Freq only) |
|
|
|
Emergency Alert (Motorola/EDACS Only) |
Digital Waiting Time (Conventional Only) |
|
|
|
Digital Threshold Mode (Conventional Only) |
||
|
|
Edit Fleet Map (Motorola Type I/lli Systems Only) |
|
Digital Threshold Level (Conventional Only) |
|
|
Scroll to the QK number (0-99 or . for no QK). |
|
|
Note: Pressing the first number of a 2-digit QK will get you closer, 1 for 10, 2 for 20, etc., then scroll to second digit. |
|
Set System Number Tag This allows you to number a System so you can access it quickly from Scan Hold Mode. The default setting is no number tag (blank). See also Using Number Tags. |
|
|
Enter the number tag (0-99) (Press .no to clear the display). |
|
Set Avoid This determines whether a System will
be scanned or not (even if the system is enabled). Temporary Avoids cancel when you
cycle power. The default setting is Stop Avoiding.
|
|
|
Stop Avoiding, Temporary Avoid, or Permanent Avoid |
|
|
Enter the hold time 0-255 (sec.) and press E/yes to save. |
|
ID Search This sets whether the scanner searches for all IDs in a trunking system (On), or scans only programmed IDs (Off). The default setting is Off. See also Toggle ID Scan or ID Search. |
|
|
On or Off |
|
Edit Fleet Map (Motorola Type I/lli Systems Only) This allows you to program a fleet map for Motorola Type I Systems. You must program a system fleet map in order for the scanner to properly track and display talk group IDs. Defaults to 0 for all blocks (Motorola Type II system). |
|
|
Block 0 Scroll to the size code (0-14)
and press E/yes. |
|
|
Note: If you select size code 12, 13, or 14, these restrictions apply: |
|
|
12
can only be assigned to Blocks 0, 2, 4 or 6. |
|
|
Since these size codes require
multiple blocks, you will be prompted for the next available block. |
|
Priority ID Scan (no P25-One Freq) This allows you to use Priority Scan with IDs in the System. The default setting is Off. See also Priority Scanning. |
|
|
On or Off |
|
Set Status Bit (Motorola
Only) This
sets how your scanner works with
Status Bits (also
called S-bits), letting you control how the scanner interprets and displays
Motorola talk group IDs. |
|
|
Yes - the scanner treats all received IDs as
unique IDs. |
|
Set End Code (Motorola Only) This sets how the scanner handles the transmission end code sent by most Motorola Systems. The default setting is Ignore. |
|
|
Analog - The scanner recognizes only analog end
transmission codes. |
|
Emergency Alert (Motorola/EDACS Only) This sets how your scanner alerts you to IDs that have the emergency flag set. The default setting is Off. |
|
|
Set Alert Tone |
|
|
Alert 1-9 or Off. |
|
|
Set Level |
|
|
Level 1-15 or Auto (the master volume level). |
|
|
Set Alert Light |
|
|
Set Color |
|
|
Off, Blue, Red, Magenta, Green, Cyan, Yellow, or White. |
|
|
Set Pattern |
|
|
On, Slow Blink, or Fast Blink. |
|
Review ID Avoids This
allows you to review Avoided IDs in the System. Temporary Avoids appear
reversed in the display- |
|
|
Scroll
to the ID and press E/yes
to Stop Avoiding. |
|
Clear All ID Avoids This allows you to Stop Avoiding all Avoided IDs in the System. |
|
|
At
Confirm?
press E/yes or .no. |
|
Set Audio AGC This allows you to turn AGC (Automatic Gain Control) on or off for the System. The default settings are Off. |
|
|
Analog - Press
E/yes
to toggle On or Off. |
|
P25 NAC Option (P25 One Freq only) This allows you to have the scanner search for NAC codes or you can program a specific code for the System. The default setting is Search. |
|
|
Search - The scanner opens squelch for any digital signal and
displays the NAC being used. |
|
|
See Data Naming. |
|
Digital Waiting Time (Conventional Only) This setting gives the scanner time to determine if channels on Conventional Systems have digital or analog transmissions. During this time, the scanner will evaluate the received signal and, if it detects digital data, will open squelch immediately. If digital is not detected before the delay expires, the scanner will open squelch at the end of this delay. This is to prevent "false decode" problems. This setting only affects conventional channels with an Audio Type set to All. The default setting is 400 ms. |
|
|
0 to 1000 |
|
|
Note: Any analog transmissions will lose the first part of the transmission, up to the wait time you set here. |
|
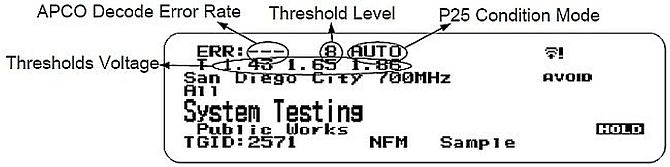
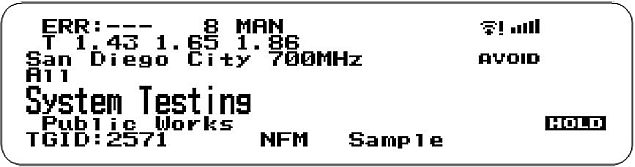
Digital Threshold Mode (Conventional Only) This mode sets the algorithm for P25 decode [1]. The default setting is Auto. |
|
|
Auto - Automatically sets the decode threshold
based on received signal. |
|
Digital Threshold Level (Conventional Only) Sets the RSSI value below which the scanner will not attempt to make P25 fine tune adjustments. If the signal is too low, RX reliability is not high enough to make P25 adjustments correctly [1]. The default setting is 8. |
|
|
0 to 20 |
![]()
| Contents |
|
|
To Create a New Department scroll to New Department and press E/yes. |
|
|
To Edit an Existing Department scroll to the Department and press E/yes. |
|
|
||
|
|
||
|
|
||
|
|
|
|
|
See Data Naming. Tip: add QK number to name. |
|
|
Scroll to the QK number (0-99 or . for no QK) |
|
|
Note: Pressing the first number of a 2-digit QK will get you closer, 1 for 10, 2 for 20, etc., then scroll to second digit. |
|
|
See Channel Options. |
|
Set Location Information This allows you
program a location for the Department with
Use Location Control enabled or
with a GPS. You can program a circle with a radial range or multiple
rectangles as a location. |
|
|
Circle |
|
|
Set Latitude |
|
|
Enter the latitude. Press .no to toggle N or S, and press E/yes. |
|
|
Set Longitude |
|
|
Enter the longitude. Press .no to toggle E or W, and press E/yes. |
|
|
Set Range See also Understanding Range. |
|
|
0-6000. |
|
|
Rectangles |
|
|
New Rectangle |
|
|
Latitude -Top Left |
|
|
Enter the latitude. Press .no to toggle N or S, and press E/yes. |
|
|
Longitude -Top Left |
|
|
Enter the longitude. Press .no to toggle E or W, and press E/yes. |
|
|
Latitude - Right Bottom |
|
|
Enter the latitude. Press .no to toggle N or S, and press E/yes. |
|
|
Longitude - Right Bottom |
|
|
Enter the longitude. Press .no to toggle E or W, and press E/yes. |
|
|
Stored Rectangle |
|
|
Edit Rectangle See New Rectangle above. |
|
|
Delete Rectangle |
|
|
At Confirm Delete? press E/yes or .no. |
|
Set Avoid This determines whether a Department will be scanned or not. Temporary Avoids cancel when you cycle power. The default setting is Stop Avoiding. See also Avoiding Transmissions. |
|
|
Stop Avoiding, Temporary Avoid, or Permanent Avoid |
|
|
At Confirm Delete? press E/yes or .no. |
|
New Department See New Department. |
![]()
| Contents |
|
Press
Menu then scroll to Manage Favorites
and press E/yes. |
|
|
To Create a New Site scroll to New Site and press E/yes. |
|
|
To Edit an Existing Site scroll to the Site and press E/yes. |
|
Note: Not all options will appear for all sites. |
|
|
|||
|
|
|||
|
|
|||
|
|
|||
|
|
|
|
|
See Data Naming. Tip: add QK number to name. |
|
|
Scroll to the QK number (0-99 or . for no QK) |
|
|
Note: Pressing the first number of a 2-digit QK will get you closer, 1 for 10, 2 for 20, etc., then scroll to second digit. |
|
Set Site Type (EDACS Only) EDACS Wide is the same as EDACS Standard and uses a 9600 baud control channel. EDACS Narrow-band sites use a 4800 baud control channel. The default setting is Wide. |
|
|
Wide or Narrow |
|
Edit Band Plan (Motorola/P25 Only) Band plans are required so the scanner can correctly determine the voice channel frequencies. |
|
|
P25 Systems |
|
|
Explicit mode systems (which comprise most systems in use) include all information needed to determine voice frequencies on the control channel, leave all entries blank. The system will automatically detect the band plan and fill in the entries. Implicit systems need you to supply the systems band plan for the scanner to correctly determine voice frequencies. |
|
|
Select Plan - Scroll to each Band 0-9, A-F (as needed), and press E/yes. |
|
|
Input Base Freq
- Enter the base frequency press E/yes. |
|
|
Press Menu to return and repeat for each band plan as needed. |
|
|
Motorola Systems |
|
|
800/900 Standard
or 800 Splinter (analog 800Mhz systems
with frequencies between 866-869 MHz ending with 0
instead of 5 e.g. 852.1250, not 852.1375). |
|
|
Motorola Rebanded and Motorola VHF/UHF Systems |
|
|
These
systems require a Custom band plan. Custom band plans require that
you enter both a lower and an upper base frequency value. The
lower base frequency (or
base)
is always the base frequency as provided in the
Radio Reference Database. |
|
|
For Standard 800 MHz Rebanded Systems, you need to set Band Plan 1 and Band Plan 2 as follows:
|
|
For Motorola Rebanded and Motorola VHF/UHF Systems, select the Custom option. |
|
|
|
Select Plan 1-6 (as needed) for each Band Plan. |
|
|
Set Base Freq |
|
|
Input Lower - Enter the lower base frequency and press E/yes. |
|
|
Input Upper - Enter the upper base frequency and press E/yes. |
|
|
Set Offset |
|
|
Input Offset - Enter the offset and press E/yes. |
|
|
Select Polarity - Scroll to + (default) or - and press E/yes. |
|
|
Set Spacing - Scroll to the step size and press E/yes. |
|
|
Press Menu to return and repeat for each band plan as needed. |
|
Set Frequencies This is where you program trunking frequencies for the Site. |
|
|
New Frequency/Edit Frequency. Enter the frequency and press E/yes. |
|
|
For EDACS and LTR sites only: |
|
|
Delete Frequency |
|
|
At Confirm Delete? press E/yes or .no. |
|
Set Modulation (no P25/One Freq) This setting selects the modulation used for the Site. The default setting is Auto. See also Site Modulation. |
|
|
Auto, NFM, or FM |
|
Set Attenuator This setting controls whether the scanner attenuates signals on the Site by about 20dBs. The default setting is Off. See also Attenuation. |
|
|
On or Off |
|
Set Avoid This determines whether a Site will be scanned or not. Temporary Avoids cancel when you cycle power. The default setting is Stop Avoiding. See also Avoiding Transmissions. |
|
|
Stop Avoiding, Temporary Avoid, or Permanent Avoid |
|
Set Location Information This allows you
program a location for the Site to use with
Use Location Control enabled or with
a GPS. You can program a circle with a radial range or multiple rectangles as
a location. |
|
|
Circle |
|
|
Set Latitude |
|
|
Enter the latitude. Press .no to toggle N or S, and press E/yes. |
|
|
Set Longitude |
|
|
Enter the longitude. Press .no to toggle E or W, and press E/yes. |
|
|
Set Range See also Understanding Range. |
|
|
0-6000. |
|
|
Rectangles |
|
|
New Rectangle |
|
|
Latitude -Top Left |
|
|
Enter the latitude. Press .no to toggle N or S, and press E/yes. |
|
|
Longitude -Top Left |
|
|
Enter the longitude. Press .no to toggle E or W, and press E/yes. |
|
|
Latitude - Right Bottom |
|
|
Enter the latitude. Press .no to toggle N or S, and press E/yes. |
|
|
Longitude - Right Bottom |
|
|
Enter the longitude. Press .no to toggle E or W, and press E/yes. |
|
|
Stored Rectangle |
|
|
Edit Rectangle See New Rectangle above. |
|
|
Delete Rectangle |
|
|
At Confirm Delete? press E/yes or .no. |
|
Digital Waiting Time (Motorola Only) This setting gives the scanner time to determine if channels on mixed Motorola Systems have digital or analog transmissions. During this time, the scanner will evaluate the received signal and, if it detects digital data, will open squelch immediately. If digital is not detected before the delay expires, the scanner will open squelch at the end of this delay. This is to prevent "false decode" problems. This setting only affects channels with an Audio Type set to All. The default setting is 400 ms. |
|
|
0 to 1000 |
|
|
Note: Any analog transmissions will lose the first part of the transmission, up to the wait time you set here. |
|
Digital Threshold Mode (Motorola/P25 Only) This mode sets the algorithm for P25 decode [1]. The default setting is Auto. |
|
|
Auto - Automatically sets the decode threshold
based on received signal. |
|
Digital Threshold Level (Motorola/P25 Only) Sets the RSSI value below which the scanner will not attempt to make P25 fine tune adjustments. If the signal is too low, RX reliability is not high enough to make P25 adjustments correctly [1]. The default setting is 8. |
|
|
0 to 20 |
|
|
At Confirm Delete? press E/yes or .no. |
|
New Site See New Site. |
![]()
| Contents |
|
In Scan Mode press
Channel to hold on any channel. |
|
|
Notes: You can also save any Frequency/ID in the
display by pressing E/yes. |
|
|
Store a Frequency into a “Quick Save” Favorites List |
|
|
At Quick frequency save? Press E/yes. |
|
|
The scanner will save the Frequency in a Favorites List called Quick Save Favorites List, in a System called Quick Save System, in a Department called Quick Save Department (with no quick keys assigned). |
|
|
Store a TGID into a “Quick Save” Department in Current System |
|
|
At Quick TGID Save? Press E/yes. |
|
|
The scanner will save the ID in a Department called Quick Save Department (with no quick key assigned) in the current system. |
|
|
Store a Frequency or ID into an Existing Favorites List |
|
|
At Quick frequency/TGID Save? Press .no. |
|
|
Select Favorites List Scroll to the Favorites List
and press E/yes. |
|
|
After storing the Frequency/ID, you will be at the Channel Options menu to complete the settings for the new channel. If you don’t want to edit the channel settings press Avoid to return. |
|
|
|
Press
Menu
then scroll to Manage Favorites and press E/yes. |
|
|
To Create a New Channel scroll to New
Channel and press E/yes. |
|
|
To Edit an Existing Channel scroll to the Channel and press E/yes. |
|
|
Note: You can also edit any Channel in the display by pressing E/yes. |
|
Note: Not all options will appear for all channels. |
|
|
|||
|
|
|||
|
|
|||
|
|
|||
|
|
|
|
See Data Naming. |
|
Edit Frequency or TGID See also Entering IDs for Partial IDs. |
|
|
Enter the frequency or ID and press E/yes to save. |
|
|
To enter a Conventional Frequency, enter the Frequency and press E/yes. |
| To enter a DMR, enter the ID and press E/yes. | |
|
|
To enter a Motorola Type II ID, enter the ID and press E/yes. |
|
|
To enter a Motorola Type I ID, enter the Block Number and Fleet Number, press .no twice for a hyphen, then enter the Subfleet and press E/yes. |
|
|
To enter an EDACS ID in AFS format, enter the Agency Number, press .no twice for a hyphen, then enter the Fleet and Subfleet and press E/yes. |
|
|
To enter an EDACS ID in Decimal format, enter the ID and press E/yes. |
|
|
To enter a LTR ID, enter the Area Code (0 or 1), enter the Home Repeater Number (01-20), then the User ID (1-254) and press E/yes. Example: 001134. |
|
|
To enter an I-Call ID, press .no once for an 'i' then enter the ID and press E/yes. |
|
|
To enter a Wildcard I-Call (any) ID, press .no once for an 'i' then enter 0 and press E/yes. |
|
|
To enter Hexadecimal IDs, see Data Naming. |
|
|
To program a Unit ID, see Edit Unit IDs. |
|
|
Notes: If the channel is already stored in the group TGID or Frequency Exists Accept? (Y/N) appears. Press .no to return. You can also Avoid wildcard and partial IDs. |
|
|
All - The scanner determines whether the audio is analog or digital. |
|
|
Digital Only - The scanner will receive the channel only if it is carrying digital audio. |
|
|
Digital Code Option |
|
|
Search - the scanner
searches and displays any digital code received. |
|
|
Note: You can also store a (blinking) NAC code when receiving the frequency in scan mode by pressing E/yes. |
|
|
Set DMR Color Code (DMR only) allows you to program a Color Code (for the channel. |
|
|
Note: You can also store a (blinking) color code when receiving the frequency in scan mode by pressing E/yes. |
|
|
Analog Only - The scanner will only receive analog audio. |
|
|
Set CTCSS/DCS |
|
|
Search - The scanner searches and displays any CTCSS or DCS tone. |
|
|
Note: You can also store a (blinking) CTCSS/DCS tone/code when receiving a frequency in scan mode by pressing E/yes. |
|
|
CTCSS -
the scanner only opens squelch if the CTCSS
tone you select is also present with the signal. Scroll to the desired CTCSS
tone you want present with the signal. Press E/yes
to save. |
|
|
Scroll to the desired tone/code you want locked out and press E/yes to save. |
|
Set Channel Number Tag This allows you to number a Channel so you can access it quickly from Channel Hold Mode. The default setting is no number tag (blank). See also Using Number Tags. |
|
|
Enter the number tag (0-999) (Press .no to clear display). |
|
Set TDMA Slot (DMR 1 Trunk only) This allows you to select which slot or any slot to be received. |
|
|
Scroll to Any, 1 or 2 and press E/yes. |
|
Set Modulation (Conventional only) This setting selects the modulation used for the channel. The default setting is Auto. See also Channel Modulation. |
|
|
Auto, AM, FM, NFM, WFM, or FMB (FM Broadcast) |
|
Set Attenuator (Conventional only) This setting controls whether the scanner attenuates signals on the Channel by about 20dB. The default setting is Off. See also Attenuation. |
|
|
On or Off |
|
Set Service Type This sets the Service Type for The Channel. The Appendix has a list of Service Types and their general descriptions. Default is Custom 1. |
|
|
Scroll to the Service Type and press E/yes. |
|
|
-10 -5, 0, 1, 2, 3, 4, 5, 10, or 30 sec. |
|
Set Priority This sets the channel as a priority channel while scanning. The default setting is Off. Note: To use Priority ID Scan you must also enable Priority ID Scan for each System. See also Priority Scanning. |
|
|
On or Off |
|
Set Alert This setting controls when and how the scanner alerts you if the channel becomes active. The default setting is Off. |
|
|
Set Alert Tone |
|
|
Alert 1-9 or Off. |
|
|
Set Level |
|
|
Level 1-15 or Auto (the master volume level). |
|
|
Set Alert Light |
|
|
Set Color |
|
|
Off, Blue, Red, Magenta, Green, Cyan, Yellow, or White. |
|
|
Set Pattern |
|
|
On, Slow Blink, or Fast Blink. |
|
Set Avoid This determines whether a channel will be scanned or not. Temporary Avoids cancel when you cycle power. The default setting is Stop Avoiding. See also Avoiding Transmissions. |
|
|
Stop Avoiding, Temporary Avoid, or Permanent Avoid |
|
Volume Offset This sets the Volume Offset for the Channel. See also Channel Volume Offset. |
|
|
-3, -2, -1, 0, +1, +2, or +3 |
|
|
At Confirm Delete? press E/yes or .no. |
|
New Channel See New Channel. |
![]()
| Contents |
|
Press
Menu
then scroll to Set Scan Selection and press E/yes. |
|
Select Lists to Monitor This setting enables or disables your Favorites Lists, Search with Scan, and the Database for scanning. You must first enable each list here, before you can enable the quick key for the list or you will see 'Nothing to Scan' in the display. Note: You will also need to set a location to enable the Full Database. |
|
|
Scroll to each Favorites List,
the Full Database, or Search with Scan and press E/yes
to enable or disable. |
|
Manage
Quick Key Status This is one way to
enable or disable your System QK's and Favorites Lists QK's. The other way is
using the number keys on the keypad. |
|
|
Favorites Quick Key |
|
|
Scroll to each Favorites List QK and press E/yes to enable or disable. Press Menu to return. |
|
|
System Quick Key |
|
|
Scroll to each Favorites List and press E/yes. |
|
|
Favorites List |
|
|
Scroll to each System QK and press E/yes to enable or disable. Press Menu to return. |
|
Set Nationwide Systems (Full Database Only) This setting enables or disables Nationwide Systems in the Full Database, only when the Full Database is enabled. |
|
|
Scroll to each Nationwide System and press E/yes to enable or disable. |
|
Set All Lists Off/On These settings disable or enable all Favorites Lists, Search with Scan, and the Full Database for scanning. |
|
|
Press E/yes to toggle each setting. |
![]()
| Contents |
|
Press
Menu then scroll to Manage Full Database
and press E/yes. |
|
Review
Avoids You can review all Database
Avoids and Stop Avoiding each one. Temporary Avoids appear reversed in
the display- |
|
|
Scroll to each System, Department, or Channel and press E/yes to stop avoiding. |
|
Stop All Avoiding This will stop avoiding all Systems, Departments, Sites, and Channels in the Full Database. See also Clear All Scan Avoids. |
|
|
At Confirm? press E/yes or .no. |
|
Information This will show the database version in the scanner. |
![]()
| Contents |
|
You can program each of your Favorites Lists with a Startup Key (0-9) so that when you power up the scanner and press the key number, just those Favorites List(s) assigned to the key will be enabled for scan. Systems are not affected. Caution: If you press the wrong key when you press the power key to set your startup configuration, and that wrong key doesn’t have any Favorites Lists assigned to that key, you will start up your scanner with all systems Avoided-Nothing to Scan. You will have to re-power the scanner with the correct Startup Key, or re-enable them in Set Scan Selection>Select Lists to Monitor. |
|
|
1. Turn the scanner off. |
|
|
2. Press and hold the number key that corresponds to the startup key when you turn the scanner on. |
|
|
3. Continue holding the number key until the scanner display shows the number of the startup key configuration. |
|
The scanner then checks all Favorites Lists and: |
|
|
1. Favorites Lists that are assigned to the Startup Key pressed are changed to Monitor Status On. |
|
|
2. Favorites Lists that are not assigned to the Startup Key pressed are changed to Monitor Status Off. |
|
Note: You can't cancel Startup Configuration, i.e. have your scanner startup with all systems unlocked they way they were before you used a Startup Configuration (unless you reset your systems, sites, and search ranges to 'no startup key'). |
![]()
| Contents |
|
Conventional Priority Scan When the scanner is scanning a Conventional System, it interrupts scanning, based on the Priority Interval and Max Channels settings, to check priority channels for activity. The more channels you have set to priority, the longer the interruption will be. The Favorites List(s) and System(s) containing the priority channel(s) have to be enabled (and not Avoided) or the scanner will display Priority Scan No Channel. Conventional Priority DND The scanner checks priority channels, based on the Priority Interval and Max Channels settings, only when not receiving other conventional channels so there is no interruption in scanning with conventional systems. Priority ID Scan This function is similar to conventional priority although there is no interruption during the transmission. Priority ID Scan is always on for a system if enabled in the system setting. Priority is checked in between transmissions, when the scanner is receiving the control channel, and during the channel delay period. The scanner can only look for priority IDs in the trunked system it is currently scanning. Preemptive Priority ID Scanning For Motorola systems that have channel priority active on the system, if you flag a channel as priority and the system also has that TGID identified as a priority channel, the scanner will preempt any current transmission if the TGID becomes active. |
|
The highest priority is for channels in System QK 0. The lowest priority is for channels in System QK 99. Priority for channels in the same Department follows the order in which they were created.
To Use Priority Scan you must first set your
Priority Channels. To Toggle Priority Modes in Scan Mode press Func then .no(Pri) to select On, DND On, or Off.
Priority Options |
|
Press Menu then scroll to Priority Scan and press E/yes. |
|
Set Priority Sets the Priority Mode. You can also toggle these modes in Scan Mode by pressing Func then .no(Pri) in Scan Mode. |
|
|
Off - The Priority feature is off. |
|
|
Priority DND - The scanner checks conventional priority channels only when not receiving other conventional channels. |
|
|
PRI appears in the display reversed- |
|
|
Priority Scan - The scanner checks conventional priority channels. |
|
|
PRI appears in the display. |
|
Set Interval This sets (in seconds) how often the scanner will check the priority channels. |
|
|
1-10 sec. |
|
|
1-100 |
![]()
| Contents |
|
With previous scanners, you selected banks to scan. With this scanner, you select Favorites Lists, Systems, Departments, and Sites to scan by assigning Quick Keys to them. See also Understanding Quick Keys. |
|
Scanning is performed with a
mixture of FLQK order and SQK order. The scanner will not scan
all Systems in one Favorites List and then move to the next List. |
|
|
Example: |
|
The Database is scanned next, in order of creation. Then, Systems with no QK (including created Quick Save Systems) are scanned in order of creation. |
|
Next, the ‘Search with Scan’ System, containing any Custom Searches or the Close Call Hits Department, is scanned in order (if Unavoided; Hits with Scan last). ‘Close Call Hits’ is a special department that automatically stores the frequencies found by Close Call. If the ‘Close Call Hits’ department has no frequencies, the scanner will not scan the system. |
|
The scanner scans a system for the duration you set using the System Hold Time option. For trunked systems, the scanner moves to the next system after the hold time expires, the current transmission ends, and the channel delay expires. Conventional systems operate similarly, but all (Unavoided) channels are scanned at least one time regardless of the hold time setting. |
|
IDs are not really scanned. The scanner checks for any activity in the trunking system and: |
|
|
Will display all IDs when
ID Search Mode is set to On. |
![]()
|
|
|
Scanning Checklist: Any Favorites List not assigned to a quick key, not Avoided, and set to On in Select Lists to Monitor will be scanned. Any System, Department, or Site not assigned to a QK and not Avoided, will be scanned. |
|
If you are programming everything in Sentinel first and sending it to the scanner: |
|
|
Edit Profile>Scan Selection tab: Make sure 'Monitor' and 'Download' are On for FL's you want to scan. Check or uncheck 'Monitor Full Database'. Edit Profile>Service Types tab: Make sure Service Types you want to monitor are checked. Custom 1 is needed for miscellaneous channels. Edit Profile>Location Settings tab: Make sure you have a location programmed for scanning the Full Database or FL's with 'Use Location Control' set to On. Edit Profile>Quick Key Status tab: Make sure FLQK's are checked for FL's you want to monitor. Edit Favorites List>System QK Status tab: Make sure SQK's are checked for systems you want to monitor. Edit Favorites List>System>Options tab: Make sure 'ID Search' is On if no IDs are programmed. Edit Favorites List>System>Dept/Site Quick Keys Status tab: Make sure Department/Site QK's are checked for departments/sites you want to monitor. Edit Favorites List>System>Dept/Site>Location tab: Make sure Departments/Sites have locations programmed if 'Use Location Control' is set to On for the FL. |
|
|
|
|
|
|
|
|
|
|
|
|
|
|
| Start/Stop Recording | View Repeater Frequency | Direct Frequency/ID Entry | Tone-Out Standby/Search |
|
|
|
|
|
|
|
Selecting Quick Keys
Leading 0’s not required but will show QK status.
|
|
|
Notes: You can press
Menu or Avoid to cancel any entry. If you make a
mistake entering numbers, you can use the scroll control to backup and correct
entries. |
|
|
Favorites List Quick Key Press the number key(s) assigned to the Favorites List, then press E/yes. |
|
|
Example: 4, E/yes toggles FL 4. |
|
|
|
|
|
System
Quick Key in the Current List Press .no, the number
key(s) assigned to the System(s), then E/yes. |
|
|
|
|
|
System Quick Key in a
Different
List Press the number key(s) assigned to the Favorites List, .no,
the number key(s) assigned to the System(s), then E/yes. |
|
|
|
|
|
Department/Site Quick Key
in the Current List Press .no, the number key(s)
assigned to the System(s), .no, the number key(s) assigned to the Department(s)
or Site(s), then E/yes. |
|
|
|
|
|
Department/Site Quick Key
in a Different List Press the number key(s) assigned to the
Favorites List, .no, the number key(s) assigned to the System, .no,
the number key(s) assigned to the Department(s) or Site(s), then E/yes.
|
|
|
|
|
|
Department/Site Quick Key
in the Current System Press .no twice, the number
key(s) assigned to the Department(s) or Site(s), then E/yes. |
|
|
|
|
|
F#: Favorites List QK - F# is first digit of FLQK. Blinking number on the right is second digit of current FLQK in Scan/Receive modes. |
|
|
|
|
|
F0: 0 1 2 3 * * * - - - indicates: |
|
|
S#: System QK - S# is first digit of SQK. Blinking number on the right is second digit of current SQK in Scan/Receive modes. |
|
|
|
|
|
S0: 0 1 2 3 * * * - - - indicates: |
|
|
D#: Site QK - Press Func
to display Site QK in Scan mode (easier to find Department if
you Hold on System first). |
|
|
|
|
|
D5: 0 1 2 3 * * * - - - indicates: |
|
|
D#: Department QK -
Conventional System - Press Func to display Department QK in
Scan/Receive/Hold modes (easier to find Department if you Hold on
System first). |
|
|
|
|
|
D# is first digit of Department QK then second digit of Department QK on the right. System QK for the Department is shown above. |
|
|
D0: - - - 3 - - - - - -
indicates: |
|
View Any QK
Status Use the examples below.
Press Avoid to exit the QK Navigation screen, or .no
until display clears. |
|
|
.. shows status of SQK's in current FL.
..# shows
status of Department/Site QK's #0-#9 in current System. |
|
|
FLQK's 0-9 - Press 0. |
FLQK's 10-19 - Press 1. |
|
|
|
|
|
|
FLQK's 0-6 On in Select Lists to Monitor
and On in Set QK Status. |
FLQK's 10-13 On in Select Lists to Monitor. |
|
|
FLQK 0 - SQK's 0-9 Press 0.0. |
FLQK 33 - SQK's 40-49 Press 33.4. |
|
|
|
|
|
|
FLQK's 0-3 On in Select Lists to Monitor
and On in Set QK Status. |
FLQK's 30-36 On in Select Lists to Monitor
and On in Set QK Status. |
|
|
FLQK 0 - SQK 0 - Dept/Site QK's 0-9 Press 0.0.0. |
FLQK 1 - SQK 1 - Dept/Site QK's 0-9 Press 01.01.0. |
|
|
|
|
|
|
FLQK's 0-3 On, 4-9 Off in Select Lists to Monitor. |
|
|
FLQK 50 - SQK 13 - Dept/Site QK's 80-89 Press 50.13.8. |
|
|
|
|
|
FLQK's 50-53 On in Select Lists to Monitor
and Off in Set QK Status ('Nothing to Scan'). |
|
|
(BCD536HP) Press Serv. |
|
|
Press
Channel to hold
on any channel and press Func
then 9(DISP).
|
|
|
While scanning
each Trunked System,
press
Func
then E/yes. |
|
Replay the Last Transmissions Your scanner Replay feature acts as an instant replay of the transmissions you’ve just heard. You can set how long a period Replay records from 30 seconds to 240 seconds (4 minutes). While you can replay those recordings immediately and continue replaying them, you cannot save them for future listening. See also Replay Options. |
|
|
While scanning, press
Replay. |
|
Start/Stop Recording With your scanner, you can record transmissions. When you begin recording, your scanner adds the Replay recording buffer to the recording. These recording sessions are saved and can be replayed on demand. See also Replay Options. |
|
|
While scanning, press Func then Replay. Resets to Off when you turn off the scanner. |
|
|
While scanning, press and hold Replay.
Scroll to the session and press E/yes. |
|
|
Channel Hold |
|
|
Press Channel to hold
on a Channel. You can now scroll all Channels. |
|
|
Department Hold |
|
|
Press Dept
to pause for 2 seconds then hold on any Department. |
|
|
System Hold |
|
|
Press
System to pause for 2 seconds then hold on any System. |
|
|
Site Hold |
|
|
Press
Func then
Dept
to hold on any Site in the current System. |
|
Avoiding Transmissions Avoids are common to every System in the Favorites List. Temporary Avoids cancel when you cycle power. See also Review Scan Avoids. |
|
|
|
|
See Add to Favorites List in the Advanced Channel Menu below. |
|
Advanced Channel Menu While the channel is in the display, press E/yes. |
|
|
Edit Current Channel - Then see Channel Options. |
|
|
|
|
At Saving channel
to Favorites List, press E/yes. |
|
|
The channel will be saved in the new or stored list with the channel’s System and Department (and all Sites in the System for an ID). |
|
|
Save Sub Audio/P25 NAC - CTCSS Tone, DCS/NAC Code, Color Code, or TDMA slot (blinking). |
|
|
At Are you sure?, press E/yes. |
|
|
Save Talk Group ID Into the current System, Unknown Talk Group ID with ID Search. |
|
|
At Are you sure?,
press E/yes. |
|
|
After storing the ID, you will be at the Channel Options menu to complete the settings for the new channel. If you don’t want to edit the settings press Avoid to return. |
|
|
Save Unit ID - The Unit ID will be stored in the current system. |
|
|
At Are you sure?, press E/yes. |
|
|
After storing the Unit ID, you will be at the Edit Unit ID menu to complete the settings for the Unit ID. If you don’t want to edit the settings press Avoid to return. |
|
|
Press E/yes. Then see Storing Search Frequencies. |
|
|
|
Channel Attenuation - Press Channel to hold
on the channel. |
|
|
Global Attenuation -
Press
Channel to hold
on any channel. |
|
Conventional Channel Modulation - Press
Channel to hold
on the Channel. Press
Func then
Channel(MOD) to toggle modulation.
|
|
Site Modulation Press Func then Dept to hold on the Site. |
|
Intermediate Frequency Exchange See also Intermediate Frequency Exchange. |
|
|
Press
Channel to hold on the channel. |
|
|
Press
Channel to hold on the channel. |
|
|
Press
Channel to hold on the channel.
|
|
|
Press Func then .no(PRI) to toggle Priority Mode Off, On, or DND On. |
|
|
Press Channel to hold
on any channel. |
|
|
To
toggle
CC Off, CC Pri, or
CC DND: |
|
Close Call Hit See Using Close Call. |
|
|
Press
Channel
to hold
on any channel.
|
|
|
(BCD536HP) Press the Zip button. |
|
|
(BCD536HP) Press the Range button. Enter new range and press
E/yes to save. |
|
|
Press Channel to hold on any Channel. |
|
|
If two Favorites Lists have the same number tag, they will be selected in sequence. The first time you select the number tag, the scanner will go to the first Favorites List assigned to that number tag; if you select the same number tag again, it will go to the 2nd Favorites List assigned to that number tag, and so on. The same rule applies to System and Channel number tags (So don't start with 0 for all your systems and channels). |
|
|
View Number Tags |
|
|
|
|
|
Go To Number Tag (Leading 0’s not required) |
|
|
|
|
Review Scan Avoids (BCD536HP Only) You can Review Avoids for the Database or for each Favorites List. |
|
|
Press
Channel to hold on any channel. |
|
|
Press
Channel to hold on any channel in the current System. |
|
Clear All Scan Avoids (BCD536HP Only) See also Manage Full Database and Manage Favorites Lists. |
|
|
You can Clear
all Avoids for the Database or for each Favorites List. |
|
|
Press Channel to hold
on any channel. |
|
|
Press
Channel to hold on the
frequency.
|
|
|
(BCD536HP)
Press and hold SQ( |
|
|
Press Channel to hold
on any channel. |
|
|
(BCD536HP Only) Press
Func then SQ. |
| P25 Adjustment Mode |
|
You may be able to optimize the scanner’s performance with digital APCO 25 frequencies. These steps work only when you can clearly receive the frequencies. If you are in a weak-signal area or receive interference, these steps will not work. These steps do not compensate for weak signals or signals subject to interference. If you set an incorrect decode threshold level, the scanner might stop decoding digital signals. If this happens, change the P25 Threshold Mode to Auto then repeat these steps. Set the P25 Threshold Mode to Manual in Site Options for the Site, System Options for any conventional channel in the System, Srch/CloCall Opt, or Edit Custom Search. Hold on any
Site, or digital conventional Frequency. |
|
|
|
|
The first line on the display will show the digital error rate and the decode threshold setting (0-20) when receiving. The second line on the display shows the decode threshold levels. Allow the scanner to monitor the site or frequency for several minutes. Press Func and rotate the Scroll Control to change the decode threshold level setting and obtain the lowest error rate possible when receiving transmissions. Whatever you set at this point will be remembered as the starting point for the auto-tuning function for subsequent transmission.
To exit P25 Adjustment Mode: |
![]()
| Contents |
|
You can connect the scanner to
a NMEA compatible GPS device and set the scanner to automatically Avoid and Unavoid
Departments and Sites based on your current location. This frees you from
having to manually enable and disable Departments and Sites as you change
locations. All Sites/Departments
with locations set and not within range of your current location will be temporarily
Avoided. All Sites/Departments without locations set will still
be scanned. For the BCD436HP, use the 4-pin mini plug under the flap to connect to the scanner. The BCD536HP has a 9-pin RS232 male serial connector on the rear and you should select a baud rate of (4800 bps) for the serial port. A good application of this feature would be to set the longitude and latitude for each multi-site system transmitter as usually you can receive at least a handful in any given location. Set the range to 0 for your location and the scanner will automatically Avoid or Unavoid Sites when in and out of range. It may also be relevant to set different locations/ranges for the Departments within the site. You can find the physical location of antennas using the databases available at Radio Reference or the FCCs Antenna Structure Registration site. Both sites list the latitude, longitude, and height of the antenna and both sites can map the exact location for you. Once the scanner completes the initial GPS review, if you move into or out of an area covered by a Site/Department, the scanner will Avoid and Unavoid Sites and Departments according to Range settings for the scanner and Sites/Departments. If you cycle power, all Sites/Departments are Unavoided until the scanner reacquires the GPS signal and completes the initial GPS review. Note: If you unplug your GPS device or it loses reception to satellites, the scanner will use the last known location as the current location. |
![]()
| Contents |
|
Trunking Discovery Mode allows you to monitor a trunked radio Site for channels not currently in the database. It can automatically record audio and log newly discovered channels for later review and identification. Conventional Discovery Mode lets you monitor a range of frequencies that are not already known to be in use in your area. This includes frequencies used conventionally as well as in trunked radio systems. It can automatically record audio and log newly discovered channels for later review and identification so that you can more easily identify the users. Both modes allow you to listen while discovering, have the option to compare hits to the Database, and log all hits or just new hits. You can create and save several sessions with different settings. Every time you start a session you create a Run. Review Discovery allows you to review the Run results, resume Runs, or restart saved Discovery Sessions. If you use the Auto Store option, Discovery will create a new Favorites List called Trunking Discovery, or Conventional Discovery. Each Session will create a new System, and each Run will create a new Department for IDs or frequencies found. Before
using this mode, set your location and location range, and enable the Database or
Favorites Lists to use for Discovery. |
|
New Session Press
Menu
then scroll to Discovery and press E/yes. |
|
|
Conventional Discovery |
|
|
Input Session Name - Enter the Name and press E/yes. See Data Naming. |
|
|
Trunking Discovery |
|
Input System Name - Press E/yes to display enabled systems and scroll to system. Press E/yes to select. |
|
|
Notes: To select the trunked system: |
|
|
Select Site
- Scroll to the Site
to use in the system and press E/yes. |
|
Press
Menu
then scroll to Discovery and press E/yes. |
|
|
|||
|
|
|||
|
|
|||
|
|
|||
|
|
|
|
See Data Naming. |
|
Set Limit Frequencies (Conventional Only) This sets the lower and upper frequencies for conventional discovery session. |
|
|
Set Lower Limit - Enter the lower limit. |
|
Set Modulation (Conventional Only) This sets the modulation for conventional discovery session. |
|
|
Auto, AM, FM, NFM, WFM, or FMB (FM Broadcast) |
|
Set Step (Conventional Only) This sets the step size for conventional discovery session. |
|
|
Auto, 5, 6.25, 7.5, 8.33, 10, 12.5, 15, 20, 25, 50, or 100 kHz. |
|
Set Delay This sets the Delay when monitoring a site or frequencies. |
|
|
0, 1, 2, 3, 4, or 5 sec. |
|
|
All or New Only |
|
Set Compare to Database Select On to compare hits against all channels currently enabled (Database and Favorites Lists) and the scanner will not record hits for known channels. Only new channels will have audio recorded (if recording is enabled). Select Off to treat all hits as new channels. |
|
|
On or Off |
|
Set Record Duration This sets the record duration of the transmission. |
|
|
None 30, 60, 90, 120, 150, 180, 300, or 600 sec. |
|
Set Time-Out Timer This is used to keep a stuck channel from stealing the whole Run in a session. |
|
|
Off, 10, 30, or 60 sec. |
|
System Info (Trunking Only) This will show you the Database used, the system type, system used, and site used. |
|
Set Auto Store This turns Auto Store on and will create a Favorites List called Conventional or Trunking Discovery. |
|
|
On or Off |
|
|
At Confirm Delete? Press E/yes or .no. |
|
Change System (Trunking Only) This allows you to select or change the System and Site used for the session. |
|
|
Input System Name |
|
|
Press E/yes
to display enabled systems and scroll to system. Press E/yes to
select. |
|
|
Select Site |
|
|
Scroll to the Site to use for the session. |
|
Start Discovery
|
|
|
Press
Menu
then scroll to Discovery and press E/yes. |
|
|
Press Avoid to Avoid a
hit. |
|
|
|
|
|
In
Review Discovery mode, you can review the results of discovery mode runs,
resume runs, or restart saved discovery sessions. You can download and review
sessions in the Sentinel software. You can also listen to recordings
from the SD card in "Mass Storage" mode. Press
Menu
then scroll to Discovery and press E/yes. Scroll to Trunking/Conventional Discovery Results and press E/yes. |
|
|
Scroll to select each Run and press E/yes. |
|
|
Review Run Results |
|
|
Summary - List by each frequency. |
|
|
Detail - List by each hit. |
|
|
Restart this Run - Delete all log files. |
|
|
Restart? Press E/yes or .no. |
|
|
Resume this Run - Continue without deleting log files. |
|
|
Resume? Press E/yes or .no. |
|
|
Delete this Run |
|
|
Confirm Delete? Press E/yes or .no. |
|
|
Rename this Run |
|
|
See Data Naming. |
|
|
Run Information |
|
|
This will show you the location info, range, the Database used, the system used, system type, site used, and other Session options. |
![]()
| Contents |
|
These are the settings you should look at before you perform a Quick Search, or Close Call Search. |
|
Press
Menu.
Scroll to Srch/CloCall Opt
and press E/yes. |
|
|
|||
|
|
|||
|
|
|
Freq Avoids This allows you to
review Avoided Frequencies or Stop Avoiding all Frequencies for Searching and
Close Call search. |
|
|
Stop All Avoiding See also Clear All Search Avoids. |
|
|
At Confirm? Press E/yes or .no. |
|
|
Rvw Search Avoid See also Review Search Avoids. |
|
|
Scroll to the Frequency and press E/yes to Stop Avoiding. |
|
|
Set All Band On/Off Turns Broadcast Screen On or Off for All Bands. |
|
|
Set Each Band |
|
|
Scroll to each Band and press E/yes to enable or disable. |
|
|
Program Band |
|
|
Band 0-9 Select for each band. |
|
|
Set Lower Limit - Input the lower frequency limit. |
|
|
Set Upper Limit - Input the upper frequency limit. |
|
|
Press Menu to return and repeat for each band as needed. |
|
|
On or Off |
|
|
-10, -5, 0, 1, 2, 3, 4, 5, 10, or 30 sec. |
|
Set Attenuator This controls the attenuator for Quick Search and Close Call operations by about 20dB. The default setting is Off. See also Search Attenuation. |
|
|
On or Off |
|
Set Audio AGC This allows you to turn AGC (Automatic Gain Control) on or off for Quick Search and Close Call Modes. The default settings are Off. |
|
|
Analog - Press
E/yes
to toggle On or Off. |
|
|
0 to 1000 ms |
|
|
Note: Any analog transmissions will lose the first part of the transmission, up to the wait time you set here. |
|
P25 Threshold Mode This mode sets the algorithm for P25 decode [1]. The default setting is Auto. |
|
|
Auto - Automatically sets the decode threshold
based on received signal. |
|
P25 Threshold Level Sets
the RSSI value below which the scanner will not attempt to make P25 fine tune
adjustments. If the signal is too low, RX reliability is not high enough to
make P25 adjustments correctly [1]. |
|
|
0 to 20 |
![]()
| Contents |
|
Press
Menu.
Scroll to Search for…
and press E/yes. |
|
|
|
Edit Custom Search |
|
|
Custom 0-9 Select for each Custom Search. |
|
|
Edit Name See Data Naming. |
|
|
Edit Srch Limit |
|
|
Set Lower Limit - Enter
the lower limit. |
|
|
Set Delay Time |
|
|
-10, -5, 0, 1, 2, 3, 4, 5, 10, or 30 sec. |
|
|
Set Modulation |
|
|
Auto, AM, NFM, FM, WFM, or FMB (Broadcast) |
|
|
Set Attenuator |
|
|
On or Off |
|
|
Set Step |
|
|
Auto, 5, 6.25, 7.5, 8.33, 10, 12.5, 15, 20, 25, 50, or 100 kHz |
|
|
Set Audio AGC |
|
|
Analog - Press
E/yes
to toggle On or Off. |
|
|
P25 Waiting Time |
|
|
This setting gives the scanner time to determine if frequencies have digital or analog transmissions. During this time, the scanner will evaluate the received signal and, if it detects digital data, will open squelch immediately. If digital is not detected before the delay expires, the scanner will open squelch at the end of this delay. This is to prevent "false decode" problems. The default setting is 400 ms. |
|
|
0 to 1000 ms. Note: Any analog transmissions will lose the first part of the transmission, up to the wait time you set here. |
|
|
P25 Threshold Mode This mode sets the algorithm for P25 decode [1]. The default setting is Auto. |
|
|
Auto - Automatically sets the decode threshold. |
|
|
P25 Threshold Level Sets the RSSI value below which the scanner
will not attempt to make P25 fine tune adjustments. |
|
|
1 to 20 |
|
|
Search with Scan |
|
|
This setting allows you to enable the Custom Search in the ‘Search with Scan’ system. See also Select Lists to Monitor and Search with Scan in the Search for… menu. |
|
|
Set Avoid |
|
|
Stop Avoiding, Temporary Avoid, or Permanent Avoid |
|
|
Set Hold Time Sets how long to search. |
|
|
Enter the hold time 0-255 (sec.) and press E/yes to save. |
|
|
Note: 0 will scan the complete range. |
|
|
Search Key 1-3 |
|
|
. (nothing assigned), Custom Search 0-9, Tone-Out, or Close Call. |
|
Search with Scan This is a special system that allows you to include Custom Searches and the ‘Hits with Scan’ department in Scan Mode. To search and scan at the same time you have to enable Search with Scan in Select Lists to Monitor, "Stop Avoiding" the Search with Scan System with this setting, and "Stop Avoiding" each Custom Search Department in Edit Custom Search and/or the Hits with Scan Department in Close Call Options. |
|
|
Set System Avoid |
|
|
Stop Avoiding, Temporary Avoid, or Permanent Avoid. |
![]()
| Contents |
|
Allows you to start searching at the
displayed frequency, or enter a frequency and start searching from that
frequency in Search Hold or Channel Hold. |
|
|
To exit Searching press Func then System. |
|
|
|
|
|
|
Change Direction or Resume Search |
|
|
Turn the Scroll Control. |
|
Select Custom Search Bands |
|
|
Press the number keys to enable or disable each Custom Search band. |
|
Replay the Last Transmissions Your scanner Replay feature acts as an instant replay of the transmissions you’ve just heard. You can set how long a period Replay records from 30 seconds to 240 seconds (4 minutes). While you can replay those recordings immediately and continue replaying them, you cannot save them for future listening. See also Replay Options. |
|
|
While searching, press
Replay. |
|
Start/Stop Recording With your scanner, you can record transmissions. When you begin recording, your scanner adds the Replay recording buffer to the recording. These recording sessions are saved and can be replayed on demand. See also Replay Options. |
|
|
While searching, press Func then
Replay. |
|
Review Recordings |
|
|
While searching, press and hold Replay.
Scroll to the session and press E/yes. |
|
Frequency Hold |
|
|
Press Channel to hold on a Frequency. |
|
|
Avoids are common to all
Searches. |
|
|
To Temporary Avoid press Avoid. |
|
|
Store a Frequency into a “Quick Save” Favorites List |
|
|
Press
E/yes when the Frequency is in the display. |
|
|
The scanner will save the Frequency in a Favorites List called Quick Save Favorites List, in a System called Quick Save System, in a Department called Quick Save Department (with no quick keys assigned). |
|
|
Store a Frequency into an Existing Favorites List |
|
|
Press
E/yes when the Frequency is in the display. |
|
|
At
Saving channel to Favorites List, press E/yes. |
|
|
After storing the Frequency/ID, you will be at the Channel Options menu to complete the settings for the new channel. If you don’t want to edit the channel settings press Avoid to return. |
|
|
Band Attenuation Press Func then 4(ATT) for each band. |
|
|
Global Attenuation Press Func
then press and hold 4(ATT). |
|
|
Press Func then Channel(MOD) for each band. |
|
Intermediate Frequency Exchange See also Intermediate Frequency Exchange. |
|
|
Press Channel to hold on any Frequency. |
|
View Repeater Frequency |
|
|
Press Channel to hold on any
Frequency. |
|
Weather Alert Priority |
|
|
Press Func then 6(WX) to toggle on or off. |
|
Close Call Modes |
|
|
To toggle
CC Off, CC Pri, or CC DND: |
|
Close Call Hit See Using Close Call. |
|
Direct Frequency Entry |
|
|
Press Channel to hold on
any Frequency |
|
|
You can Review Avoids for all
Searches including Close Call. See also
Freq
Avoids. |
|
|
Press
Channel to hold
on any
Frequency in any Search Mode. |
|
Search
Menu |
![]()
| Contents |
|
Your scanner's Close Call feature lets you set the scanner so it detects, alerts you to, and displays the frequency of a nearby strong radio transmission. You can set the scanner so the Close Call feature checks for a Close Call hit every 2 seconds in the background while you are scanning or searching or use Close Call Only mode. You can also select the frequency band(s) to look for transmissions. When the scanner detects a Close Call hit, it alerts you according to the alert settings. Close Call ‘Do-Not-Disturb' will only check for close call signals when you are not receiving transmissions. 'Hits with Scan' is a special system that automatically stores the last 10 Close Call hits until you cycle power. The Close Call feature works well for locating the source of strong local transmissions such as mobile and handheld two-way radios in areas with no other strong transmission sources. Performance is increased with higher transmit power, a receive antenna tuned to the target band, and a low background RF level. The Close Call feature works
better with some types of transmissions than others. It might not correctly
display frequency information for transmitters using a highly directional
antenna (such as an amateur radio beam antenna) or if there are many
transmitters operating at the same time in the same area. |
|
Important! There are many
options and settings in
Search/Close Call Options
that affect and compliment the settings for Close Call. Please review those
first. |
|
|
||
|
|
||
|
|
|
|
Hits with Scan This is a special Department that automatically stores the last 10 close call hits and allows you to scan them. To scan the 'Hits with Scan' department you have to enable Search with Scan in Select Lists to Monitor, "Stop Avoiding" the Search with Scan System, and "Stop Avoiding" the Department with this setting. The scanner will delete the frequencies in this department when you turn the power off. To store each frequency, you will have to 'Hold' on the department then 'Hold' on each channel in the department and use the 'Advanced Channel Menu' to 'Add to Favorites List'. |
|
|
Set Avoid |
|
|
Stop Avoiding, Temporary Avoid, or Permanent Avoid |
|
|
Set Hold Time Sets how long to search in Search with Scan. |
|
|
Enter the hold time 0-255 (sec.) and press E/yes to save. |
|
Set CC Mode selects the Close Call mode when scanning or searching. |
|
|
Off-
Close Call is turned off. |
|
|
Note: You can also toggle these modes
by: |
|
Set CC Alert This allows you to set an Alert Tone, Alert Light, and sets the Pause time for Close Call when you receive a hit. |
|
|
Set Alert Tone |
|
|
Alert 1-9 or Off. |
|
|
Set Level |
|
|
Level 1-15 or Auto (the master volume level). |
|
|
Set Alert Light |
|
|
Set Color |
|
|
Off, Blue, Red, Magenta, Green, Cyan, Yellow, or White. |
|
|
Set Pattern |
|
|
On, Slow Blink, or Fast Blink. |
|
|
Set CC Pause - How long the scanner displays the Close Call Hit. |
|
|
3, 5, 10, 15, 30, 45, 60, sec. or Infinite. |
|
Set CC Bands lets you select the Close Call bands to be searched. |
|
|
Scroll to each Band and press
E/yes to toggle
On or Off. |
|
|
VHF Low 1 - 25-54 MHz |
VHF High2 - 225-320 MHz |
|
|
VHF Low 2 - 54-108 MHz |
UHF - 320-512 MHz |
|
|
Air Band - 108-137 MHz |
800MHz+ - 758-960, 1240-1300 MHz |
|
|
VHF High1
- 137-225 MHz |
(Cellular frequencies not scanned) |
|
(BCD536HP) Press and hold
SQ( |
|
|
|
When the scanner detects a Close Call signal, the hit will appear for the length of time set in Close Call Pause or until the signal is lost. |
|
Toggle Close Call Bands |
|
|
Press the number keys to enable or disable each Close Call band. |
|
Cancel a Hit |
|
|
Turn the Scroll Control. |
|
Holding on a Hit |
|
|
Press
System, Department, or Channel to hold
on the Close Call Hit. |
|
View Last Hit |
|
|
Press System, Department, or Channel to recall the last hit. |
|
|
|
Replay the Last Transmissions Your scanner Replay feature acts as an instant replay of the transmissions you’ve just heard. You can set how long a period Replay records from 30 seconds to 240 seconds (4 minutes). While you can replay those recordings immediately and continue replaying them, you cannot save them for future listening. See also Replay Options. |
|
|
While searching, press
Replay. |
|
Start/Stop Recording With your scanner, you can record transmissions. When you begin recording, your scanner adds the Replay recording buffer to the recording. These recording sessions are saved and can be replayed on demand. See also Replay Options. |
|
|
While searching, press Func then
Replay. |
|
Review Recordings |
|
|
During Close Call, press and hold Replay.
Scroll to the session and press E/yes. |
|
Avoiding Hits See also Review Search Avoids. |
|
|
Avoids are common to all
Searches. |
|
Storing Hits |
|
|
Press Channel to hold on the hit. Then see Storing Search Frequencies. |
|
Close Call Attenuation |
|
|
Band Attenuation - Press Func then 4(ATT) for all bands. |
|
Modulation |
|
|
Press Func then Channel(MOD) for all bands. |
|
Intermediate Frequency Exchange See also Intermediate Frequency Exchange. |
|
|
Press Channel to hold on any Frequency. |
|
View Repeater Frequency |
|
|
Press Channel to hold
on any
Frequency. |
|
Quick Search at Current Frequency |
|
|
Press Channel to hold on
the Frequency. |
|
Weather Alert Priority Mode |
|
|
Press Func then 6(WX) to toggle on or off. |
|
Close Call Menu Press Func then Menu. |
![]()
| Contents |
|
Press
Menu.
Scroll to WX Operation
and press E/yes. |
|
|
||
|
|
||
|
|
||
|
|
|
Program SAME SAME (Specific Area Messaging System) is a system developed by the National Weather Service to reduce the number of alerts received by consumers by allowing them to hear alerts only for the counties they are interested in. Each alert contains information about the type and severity of the alert, as well as the specific geographic locations affected by the alert. See also SAME Event Codes. To receive SAME alerts, you can program up to 5 groups of 8 FIPS codes. To find the FIPS codes for your scanner call the NWS toll free at 1-888-697-7263 (follow the instructions you hear) or see FIP codes for the United States and its Possessions. |
|
|
SAME 0-4 Select for each SAME group. |
|
|
Edit Name See Data Naming. |
|
|
Edit County |
|
|
Code 1-8 Select for each FIP code. |
|
|
Enter the FIPS code and press E/yes to save. |
|
|
-10, -5, 0, 1, 2, 3, 4, 5, 10, or 30 sec. |
|
Set Attenuator Sets the attenuator (20 dB) for weather operation. The default setting is Off. |
|
|
On or Off |
|
Set Audio AGC This allows you to turn AGC (Automatic Gain Control) on or off for Weather operations. The default setting is Off. |
|
|
Analog - Press E/yes to toggle On or Off. |
|
|
On or Off |
|
|
Note: You can also toggle weather alert priority in
scan or search modes by holding on any channel and pressing Func then 6(WX). |
|
|
|
Press Channel to hold on any channel/frequency. The scanner starts scanning
the preprogrammed weather frequencies and stops on the first good signal. If
the signal is lost, the scanner resumes searching for another weather
transmission. |
|
Change Channel |
|
|
Turn the Scroll Control. |
|
Attenuation |
|
|
Press then 4(ATT). |
|
Intermediate Frequency Exchange See also Intermediate Frequency Exchange. |
|
|
Press Func then 7(IFX) to toggle on or off. |
|
Store Frequency |
|
|
|
Weather
Menu
Press
Func
then Menu. |
|
This setting turns on Weather
Alert and determines which types of signals will trigger an alert. See also
Program SAME. |
|
|
Alert Only - The scanner will scan all the weather channels and immediately sound a weather alert siren when it detects the 1050 Hz weather alert tone. Press any key to stop the siren which opens the squelch and the scanner remains on the weather channel. |
|
|
SAME 0-4 - The scanner sounds a weather alert siren for any programmed counties. The scanner displays warning level as "Warning WX", "Watch WX" or "Advisory WX" and it displays decoded Event Code. When an alert is received, press any key to listen to the alert. |
|
|
All FIPS - The scanner sounds a weather alert
siren for any county. |
|
The
scanner will mute and scan only the weather channels. |
|
|
|
|
|
Replay and review WX/SAME alert event results. The scanner drops these alert events after the alert time expires. Weather alerts are always recorded and you can review the alerts in the WX Operations menu by scrolling to Review WX Alerts. |
![]()
| Contents |
|
Your scanner can be set to respond to fire tone-outs, a system comprised of standardized two-tone sequential paging, short one-tone paging, and long group tone paging. Fire-Tone-Out will monitor up to 32 different channels for paging tones (two-tone sequential, single tone, and group tone). For more information on Fire Tone-Out see this webpage at Radio Reference. Tone-Out Standby Mode is used if you use programmed tones. Tone-Out Search Mode is used if you don’t know the tones. All Tone-Outs (channels) that have the same frequency (and modulation and attenuation) as the one you select will also (and only) be monitored so you can monitor up to 32 Tone-Out channels for one frequency. In this case, the scanner displays each Tone-Out channel for two seconds. It does not scan them; Tone-Out monitors the frequency for all Tone-Out channels with the same frequency. Regardless of the current display, the scanner will alert
on any received tone out that matches a stored setting (channel) for the frequency. |
|
Press
Menu.
Scroll to Tone-Out for...
and press E/yes. |
|
|
||
|
|
||
|
|
||
|
|
|
|
Edit Name See Data Naming. |
|
|
Edit Frequency |
|
|
Enter the frequency and press E/yes. |
|
|
Set Modulation |
|
|
Auto, NFM, FM |
|
|
Set Attenuator |
|
|
On or Off |
|
|
Edit Tone A and press E/yes. Enter the tone and press
E/yes to save. |
|
|
For
two-tone pages, enter the tones (in Hz)
for tone A and tone B. |
|
Set Delay Time The scanner resumes Standby as soon as the carrier drops after a page. A negative delay will force a resume after that number of seconds. The default setting is 2 seconds. |
|
|
0 - the
scanner resumes standby as soon as the carrier drops after a page. |
|
|
Set Alert Tone |
|
|
Alert 1-9 or Off. |
|
|
Set Level |
|
|
Level 1-15 or Auto (the master volume level). |
|
|
Set Alert Light |
|
|
Set Color |
|
|
Off, Blue, Red, Magenta, Green, Cyan, Yellow, or White. |
|
|
Set Pattern |
|
|
On, Slow Blink, or Fast Blink. |
|
Set Audio AGC This allows you to turn AGC (Automatic Gain Control) on or off for Tone-Out operations. The default setting is Off. |
|
|
Analog - Press E/yes
to toggle On or Off. |
|
Press Menu. Scroll to
Tone-Out for... and
press E/yes. |
|
Scroll to monitor a Tone-Out
channel (0-31). Note: Close Call DND/Pri and Weather Alert Priority do not operate in this mode. |
|
|
|
Any transmission received on the
frequency will not be heard but you will still see the signal strength bars.
If you press Channel while in Standby/Search mode, the scanner temporarily exits and you will be able to hear any transmissions on that frequency. No alerts sound, even if a Tone-Out matches one you have programmed in Hold Mode. Press Channel again to return to Standby/Search Mode. |
|
|
|
Note: Tone-Out Search Mode will
not display each Tone-Out channel for two seconds, even when multiple
channels have the same frequency, modulation, and attenuator settings with
other channels. |
|
Select a Different Tone-Out |
|
|
Turn the Scroll Control. |
|
Listen to Tone-Out Frequency |
|
|
Press Channel. |
|
Attenuation |
|
|
Press
Func then 4(ATT)
for each Tone-Out. |
|
Modulation |
|
|
Press Func then Channel(MOD) for each Tone-Out.. |
|
Intermediate Frequency Exchange See also Intermediate Frequency Exchange. |
|
|
Press Func then 7(IFX) to toggle on or off for each Tone-Out.. |
|
Start/Stop Recording With your scanner, you can record transmissions. When you begin recording, your scanner adds the Replay recording buffer to the recording. These recording sessions are saved and can be replayed on demand. See also Replay Options. |
|
|
Press
Func
then Replay. |
|
Review Recordings |
|
|
In Tone-Out Standby/Search, press and hold
Replay. Scroll to the session and press E/yes. |
|
|
Press E/yes when you hear a Tone-Out. |
|
Tone-Out Menu |
|
|
Press Func then Menu. |
![]()
| Related Links/Info | Contents |
|
Determining
Type I Motorola Fleetmaps
You can try a method I found at Radio Reference.com.
Determining Type I Motorola Fleet Maps.
By Dave Goodson. |
|
Determining Motorola VHF/UHF Base
and Offset Frequencies I have found an
explanation at
Radio Reference.com that describes how
to do this if you don't have the information. The
Trunked Radio Systems
Users Page also has an explanation. Look for
'Determining Base and Offset Frequencies for the
BC245xlt' by John C. |
|
Finding EDACS LCN order
EDACS
frequencies have to be programmed in LCN
(Logical Channel Number) order. I have found a
procedure at the
Trunked Radio Systems
Users Page which explains how to find
the LCN order for an EDACS system if you don't know the
order. Look
for 'Finding EDACS Logical Channel Numbers' by Todd Hartzel near the bottom of
the page. |
|
Finding LTR LCN order LTR frequencies have to be programmed into certain channel slots for the system to trunktrack properly. Radio Reference has a good webpage here: Mapping LTR Systems. |
|
|
|
Decimal/AFS
Conversion Chart
Here is a
Conversion
Chart to
help convert your IDs. |
|
Newsgroups and Forums |
|
You will have to register for the groups. |
|
|
|
|
Links |
|
Excel file for converting Conventional systems in FreeSCAN to Sentinel |
|
|
Excel file for converting Trunked systems in FreeSCAN to Sentinel |
|
|
![]()
| Contents |
|
Troubleshooting Scan
Mode, Nothing to Scan: All Channels out of Range: Scanning
Interrupted: |
|
Characters for a File/Folder Name are as follows: “A-Z, a-z, 0-9, _()-“ System Name and Set Discovery Name of Discovery Menu. Characters for a Name Tag are as follows: “A-Z, a-z, 0-9, [\]^_`{|}~!”#$%&’()*+,-./:;<=>?@ “ Edit Channel, Department, Site, System. |
|
Frequency Range |
Mode |
Step (kHz) |
Band |
|
|
Lower |
Upper |
|||
|
25.0000 |
26.9600 |
AM |
5 |
11m Broadcast |
|
26.9650 |
27.4050 |
AM |
5 |
CB Class D Channel |
|
27.4100 |
27.9950 |
AM |
5 |
Business & Forest Products |
|
28.0000 |
29.6800 |
NFM |
20 |
10 Meter Amateur Band |
|
29.7000 |
49.9900 |
NFM |
10 |
VHF Low Band |
|
54.0000 |
71.9500 |
WFM |
50 |
VHF TV Broadcast 2 – 4 |
|
72.0000 |
75.9500 |
FM |
5 |
Intersystem & Astronomy |
|
76.0000 |
87.9500 |
WFM |
50 |
VHF TV Broadcast 5 – 6 |
|
88.0000 |
107.900 |
FMB |
100 |
FM Broadcast |
|
108.0000 |
136.9916 |
AM |
8.33 |
Commercial Aircraft |
|
137.0000 |
143.9875 |
NFM |
12.5 |
Military Land Mobile |
|
144.0000 |
147.9950 |
NFM |
5 |
2 Meter Amateur Band |
|
148.0000 |
150.7875 |
NFM |
12.5 |
Military Land Mobile |
|
150.8000 |
161.9950 |
NFM |
5 |
VHF High Band |
|
162.0000 |
173.9875 |
NFM |
12.5 |
Federal Government |
|
174.0000 |
215.9950 |
FM |
5 |
TV Broadcast 7 – 13 |
|
216.0000 |
224.9800 |
NFM |
20 |
1.25 Meter Amateur Band |
|
225.0000 |
379.9750 |
AM |
25 |
UHF Aircraft Band |
|
380.0000 |
399.9875 |
NFM |
12.5 |
Trunked Military Band |
|
400.0000 |
405.9875 |
NFM |
12.5 |
Miscellaneous |
|
406.0000 |
419.9875 |
NFM |
12.5 |
Trunked Federal Government Band |
|
420.0000 |
449.9875 |
NFM |
12.5 |
70 cm Amateur Band |
|
450.0000 |
469.9875 |
NFM |
12.5 |
UHF Standard Band |
|
470.0000 |
512.0000 |
NFM |
12.5 |
UHF TV Band |
|
758.0000 |
787.99375 |
NFM |
6.25 |
Public Service Band |
|
788.0000 |
805.99375 |
NFM |
6.25 |
Public Service Band |
|
806.0000 |
823.9875 |
NFM |
12.5 |
Public Service Band |
|
849.0125 |
868.9875 |
NFM |
12.5 |
Public Service Band |
|
894.0125 |
960.0000 |
NFM |
12.5 |
Public Service Band |
|
1240.0000 |
1300.0000 |
NFM |
25 |
25 cm Amateur Band |
|
When you select AUTO for a
channel, modulation, or step, the above values are used unless you’ve edited
the
Band Defaults. |
|
Service Type *=default |
Description |
|
Aircraft |
For civilian aircraft and air traffic control operations in the 118-136 MHz and 225-380 MHz bands in AM mode. |
|
Business |
Most business related entities not covered by other tags. |
|
Corrections |
Jail/prison operations, corrections activities, federal prisons. |
|
Emergency Ops |
Emergency Operation Centers and similar emergency management or disaster related operations. |
|
EMS Dispatch* |
Ambulance dispatch, including rescue squads. |
|
EMS-Tac |
Ambulance on-scene communications, tactical operations and secondary channels. |
|
EMS-Talk |
Ambulance talk-around, car-to-car and supervisor operations. |
|
Federal |
All federal government operations (except corrections, traditional law enforcement patrol and fire/EMS operations). |
|
Fire Dispatch* |
Fire dispatch, including combined fire/ambulance dispatch. |
|
Fire-Tac |
Fireground, tactical and on-scene communications, including combined fire/ambulance operations. |
|
Fire-Talk |
Fire talk-around and car-to-car operations, chiefs, supervisors, including combined fire/ambulance operations. |
|
Ham |
Any amateur radio assignment. |
|
Hospital |
Ambulance-to-Hospital communications and patient reports. |
|
Interop |
Interoperability communications, cross-agency communications, mutual aid, etc. |
|
Law Dispatch* |
Law enforcement dispatch. |
|
Law-Tac |
Law enforcement tactical, SWAT, on-scene, surveillance and specific sub-agency communications. |
|
Law Talk |
Law enforcement talk-around, car-to-car and supervisor operations. |
|
Media |
Newspapers, television and broadcast radio operations. |
|
Military |
Military operations, e.g., range control, air-to-air combat, etc. |
|
Multi-Dispatch* |
Combined law enforcement and fire/ambulance dispatch. |
|
Multi-Tac |
Combined law enforcement and fire/ambulance tactical and on-scene communications. |
|
Multi-Talk |
Combined law enforcement and fire/ambulance tactical talk-around and car-to-car operations. |
| Other | Miscellaneous |
|
Public Works |
Public agency non-public safety communications. This includes any non-public safety government services, such as trash, streets, roads, sewer, zoos, administration, maintenance, animal control, community initiatives, code compliance, etc. |
|
Railroad |
All common carrier railroad communications. |
|
Schools |
School-related communications (schools, school buses, football games, etc.). |
|
Security |
Non-law enforcement security operations, including private security companies, noncommissioned government agency security, school security, etc. |
|
Transportation |
Public and private bus, taxi, and public passenger rail communications. |
|
Utilities |
Private electric, water, natural gas, phone, cable TV, etc. operations. |
|
Race Officials |
Available for use to identify officials’ frequencies for racing events. |
|
Race Teams |
Available for use to identify team frequencies for racing events. |
|
Custom 1*-8 |
Custom 1 is default for new
channels. Custom 2-8 can be used for custom groups of channels in systems,
sites, etc. |
|
Removing the Micro SD Card |
|
Carefully remove the SD Card on
the BCD536HP by using a thumbnail or pencil eraser to push the card in so it
will spring out. With the BCD436HP, slide the metal cover under the batteries
to the right and the card will spring up. Pull the card and bracket all the
way up and carefully slide the card out. Handle with care if you are going to
use it in a card reader. Gently install the SD Card the reverse way it was
removed. |
|
Reformatting the Micro SD Card |
|
SD cards should only be formatted using the special
SD Card Formatter. Cards up
to 32GB are supported. After formatting, the scanner may not be automatically
detected (since it is wiped clean), so you may need to uncheck "Hide empty
drives" in (Windows 7) Tools>Folder Options>View before doing the next "Clear
User Data" step. Then, you need to "Clear User Data" and check "Display all
drives" using Sentinel to restore all files and directories to the card. You
will also need to "Write to Scanner" in the "Scanner" menu to restore your
Favorites Lists. |
|
These are the acceptable entry
formats for IDs. |
|
System Type |
TGID Format |
|
Motorola Type I Systems
N=Decimal Number |
BFF-SS Normal ID |
|
NNNNN (size code 0) |
|
|
Motorola Type II Systems
H=Hexadecimal Character |
Decimal Format |
|
NNNNN |
|
|
Hexadecimal Format |
|
|
HHH |
|
|
P25 Systems
H=Hexadecimal Character |
Decimal Format |
|
NNNNN |
|
|
Hexadecimal Format |
|
|
HHHH |
|
|
EDACS Systems |
AFS Format |
|
AA-FFS Normal ID |
|
|
Decimal Format |
|
|
NNNN |
|
|
LTR Systems UUU = Decimal Number (000-254) |
|
| These are some common fleet maps to
choose from. In Motorola II systems, all the blocks have
size code S-0. In Type I systems,
size codes are used in different blocks to denote the
maximum number of users in that block. Notice that size
code 12 uses 2 blocks. A Motorola Hybrid system (Type
IIi) has 'blocks' of the system that are Type I
Fleets/Subfleets and Type II talk groups. The maps that are Hybrid systems are in bold. |
| Fleet Map 1 | Fleet Map 2 | Fleet Map 3 | Fleet Map 4 | Fleet Map 5 | Fleet Map 6 | Fleet Map 7 | Fleet Map 8 | ||||||||
| Block | Size Code | Block | Size Code | Block | Size Code | Block | Size Code | Block | Size Code | Block | Size Code | Block | Size Code | Block | Size Code |
| 0 | S-11 | 0 | S-4 | 0 | S-4 | 0 | S-12 | 0 | S-4 | 0 | S-3 | 0 | S-10 | 0 | S-1 |
| 1 | S-11 | 1 | S-4 | 1 | S-4 | 1 | (S-12) | 1 | S-4 | 1 | S-4 | 1 | S-10 | 1 | S-1 |
| 2 | S-11 | 2 | S-4 | 2 | S-4 | 2 | S-4 | 2 | S-12 | 2 | S-4 | 2 | S-11 | 2 | S-2 |
| 3 | S-11 | 3 | S-4 | 3 | S-4 | 3 | S-4 | 3 | (S-12) | 3 | S-4 | 3 | S-4 | 3 | S-2 |
| 4 | S-11 | 4 | S-4 | 4 | S-4 | 4 | S-4 | 4 | S-4 | 4 | S-12 | 4 | S-4 | 4 | S-3 |
| 5 | S-11 | 5 | S-4 | 5 | S-4 | 5 | S-4 | 5 | S-4 | 5 | (S-12) | 5 | S-4 | 5 | S-3 |
| 6 | S-11 | 6 | S-4 | 6 | S-12 | 6 | S-4 | 6 | S-4 | 6 | S-12 | 6 | S-4 | 6 | S-4 |
| 7 | S-11 | 7 | S-4 | 7 | (S-12) | 7 | S-4 | 7 | S-4 | 7 | (S-12) | 7 | S-4 | 7 | S-4 |
| Fleet Map 9 | Fleet Map 10 | Fleet Map 11 | Fleet Map 12 | Fleet Map 13 | Fleet Map 14 | Fleet Map 15 | Fleet Map 16 | ||||||||
| Block | Size Code | Block | Size Code | Block | Size Code | Block | Size Code | Block | Size Code | Block | Size Code | Block | Size Code | Block | Size Code |
| 0 | S-4 | 0 | S-0 | 0 | S-4 | 0 | S-0 | 0 | S-3 | 0 | S-4 | 0 | S-4 | 0 | S-3 |
| 1 | S-4 | 1 | S-0 | 1 | S-0 | 1 | S-0 | 1 | S-3 | 1 | S-3 | 1 | S-4 | 1 | S-10 |
| 2 | S-0 | 2 | S-0 | 2 | S-0 | 2 | S-0 | 2 | S-11 | 2 | S-10 | 2 | S-4 | 2 | S-10 |
| 3 | S-0 | 3 | S-0 | 3 | S-0 | 3 | S-0 | 3 | S-4 | 3 | S-4 | 3 | S-11 | 3 | S-11 |
| 4 | S-0 | 4 | S-0 | 4 | S-0 | 4 | S-0 | 4 | S-4 | 4 | S-4 | 4 | S-11 | 4 | S-0 |
| 5 | S-0 | 5 | S-0 | 5 | S-0 | 5 | S-0 | 5 | S-0 | 5 | S-4 | 5 | S-0 | 5 | S-0 |
| 6 | S-0 | 6 | S-4 | 6 | S-0 | 6 | S-0 | 6 | S-0 | 6 | S-12 | 6 | S-12 | 6 | S-12 |
| 7 | S-0 | 7 | S-4 | 7 | S-0 | 7 | S-4 | 7 | S-0 | 7 | (S-12) | 7 | (S-12) | 7 | (S-12) |
You can tell which block a Motorola ID is
in by its number.
|
|
Thanks to Radio Reference.com for most of this information. |
|
|
|
Type II Motorola Smartnet systems use these status bits for special transmissions such as emergency, patches, DES/DVP scrambled transmissions, and multiselects. Motorola trunking radios directly interpret them for their special functions, thus no difference is noticed by the person with the radio. The scanner however interprets these special talk group status bits as different talk groups entirely. Below is the conversion chart for these special status bits. |
|
TT ID + # Usage |
TT ID + # Usage |
|
ID+0 Normal Talk group |
ID+8 DES/DVP Encryption talk group |
|
ID+1 All Talk group |
ID+9 DES All Talk group |
|
ID+2 Emergency |
ID+10 DES Emergency |
|
ID+3 Talk group patch to another |
ID+11 DES Talk group patch |
|
ID+4 Emergency Patch |
ID+12 DES Emergency Patch |
|
ID+5 Emergency multi-group |
ID+13 DES Emergency multi-group |
|
ID+6 unassigned |
ID+14 unassigned |
|
ID+7 Multi-select (initiated by dispatcher) |
ID+15 Multi-select DES TG |
|
Therefore, if a user was
transmitting a multi-select call on talk group 1808, the scanner would
actually receive those transmissions on 1815. |
|
|
When a user hits their emergency button, all conversations on the talk group revert to the emergency status talk group (ID+2) until the dispatch clears the emergency status. Therefore, if someone hit their emergency button and their radio was on talk group 16, all communications would switch to talk group 18. A lot of Fire and EMS
departments dispatch tone-outs and alarms as Multi-select communications
(ID+7). Therefore, if your fire department dispatch talk group is 1616, and
they do dispatch tone-outs and alarms as Multi-selects, then those
communications will be on talk group 1623. |
|
Weather Channels |
|
Channel |
Frequency |
Channel |
Frequency |
|
1 |
162.550 |
5 |
162.450 |
|
2 |
162.400 |
6 |
162.500 |
|
3 |
162.475 |
7 |
162.525 |
|
4 |
162.425 |
|
|
|
Standard |
Event Code |
Warning |
||
|
|
Watch |
|||
|
|
Advisory |
|||
|
ADR |
Administrative Message |
|
|
X |
Admin Message |
|
AVA |
Avalanche Watch |
|
X |
|
Avalanche |
|
AVW |
Avalanche Warning |
X |
|
|
Avalanche |
|
BHW |
Biological Hazard Warning |
X |
|
|
Biological |
|
BWW |
Boil Water Warning |
X |
|
|
Boil Water |
|
BZW |
Blizzard Warning |
X |
X |
|
Blizzard |
|
CAE |
Child Abduction Emergency |
|
|
X |
Child Emergency |
|
CDW |
Civil Danger Warning |
X |
|
|
Civil Danger |
|
CEM |
Civil Emergency Message |
X |
|
|
Civil EMG |
|
CFA |
Coastal Flood Watch |
|
X |
|
Coastal Flood |
|
CFW |
Coastal Flood Warning |
X |
|
|
Coastal Flood |
|
CHW |
Chemical Hazard Warning |
X |
|
|
Chemical |
|
CWW |
Contaminated Water Warning |
X |
|
|
Contam. Water |
|
DBA |
Dam Watch |
|
X |
|
Dam Break |
|
DBW |
Dam Break Warning |
X |
|
|
Dam Break |
|
DEW |
Contagious Disease Warning |
X |
|
|
Contagious |
|
DMO |
Practice/Demo |
|
|
X |
System Demo |
|
DSW |
Dust Storm Warning |
X |
|
|
Dust Storm |
|
EAN |
Emergency Action Notification |
X |
|
|
EMG Notify |
|
EAT |
Emergency Action Termination |
|
|
X |
EMG Terminate |
|
EQW |
Earthquake Warning |
X |
|
|
Earthquake |
|
EVA |
Evacuation Watch |
|
X |
|
Evacuate Note |
|
EVI |
Immediate Evacuation |
X |
|
|
Evacuate Note |
|
FCW |
Food Contamination Warning |
X |
|
|
Food |
|
FFA |
Flash Flood Watch |
|
X |
|
Flash Flood |
|
FFS |
Flash Flood Statement |
|
|
X |
Flash Flood |
|
FFW |
Flash Flood Warning |
X |
|
|
Flash Flood |
|
FLA |
Flood Watch |
|
X |
|
Flood |
|
FLS |
Flood Statement |
|
|
X |
Flood |
|
FLW |
Flood Warning |
X |
|
|
Flood |
|
FRW |
Fire Warning |
X |
|
|
Fire |
|
FSW |
Flash Freeze Warning |
X |
|
|
Flash Freeze |
|
FZW |
Freeze Warning |
X |
|
|
Freeze |
|
HLS |
Hurricane Statement |
|
|
X |
Hurricane |
|
HMW |
Hazardous Material Warning |
X |
|
|
Hazardous |
|
HUA |
Hurricane Watch |
|
X |
|
Hurricane |
|
HUW |
Hurricane Warning |
X |
|
|
Hurricane |
|
HWA |
High Wind Watch |
|
X |
|
High Wind |
|
HWW |
High Wind Warning |
X |
|
|
High Wind |
|
IBW |
Iceberg Warning |
X |
|
|
Iceberg |
|
IFW |
Industrial Fire Warning |
X |
|
|
Industrial Fire |
|
LAE |
Local Area Emergency |
|
|
X |
Local EMG |
|
LEW |
Law Enforcement Warning |
X |
|
|
Law Enforcement |
|
LSW |
Land Slide Warning |
X |
|
|
Land Slide |
|
NAT |
National Audible Test |
|
|
X |
National Audible |
|
NIC |
National Information Center |
|
|
X |
National Info |
|
NMN |
Network Notification Message |
|
|
X |
Network Message |
|
NPT |
National Periodic Test |
|
|
X |
Nation Period |
|
NST |
National Silent Test |
|
|
X |
Nation Silent |
|
NUW |
Nuclear Power Plant Warning |
X |
|
|
Nuclear Plant |
|
POS |
Power Outage Advisory |
|
|
X |
Power Outage |
|
RHW |
Radiological Hazard Warning |
X |
|
|
Radiological |
|
RMT |
Required Monthly Test |
|
|
X |
Monthly |
|
RWT |
Required Weekly Test |
|
|
X |
Weekly |
|
SMW |
Special Marine Warning |
X |
|
|
Special Marine |
|
SPS |
Special Weather Statement |
|
|
X |
Special WX |
|
SPW |
Shelter In-Place Warning |
X |
|
|
Shelter |
|
SVA |
Severe Thunderstorm Watch |
|
X |
|
Thunderstorm |
|
SVR |
Severe Thunderstorm Warning |
X |
|
|
Thunderstorm |
|
SVS |
Severe Weather Statement |
|
|
X |
Severe WX |
|
TOA |
Tornado Watch |
|
X |
|
Tornado |
|
TOE |
911 Telephone Outage Emergency |
|
|
X |
911 Phone Outage |
|
TOR |
Tornado Warning |
X |
|
|
Tornado |
|
TRA |
Tropical Strom Watch |
|
X |
|
Tropical Storm |
|
TRW |
Tropical Storm Warning |
X |
|
|
Tropical Storm |
|
TSA |
Tsunami Watch |
|
X |
|
Tsunami |
|
TSW |
Tsunami Warning |
X |
|
|
Tsunami |
|
TXB |
Transmitter Backup On |
|
|
X |
TX Backup On |
|
TXF |
Transmitter Carrier Off |
|
|
X |
TX Carrier Off |
|
TXO |
Transmitter Carrier On |
|
|
X |
TX Carrier On |
|
TXP |
Transmitter Primary On |
|
|
X |
TX Primary On |
|
VOW |
Volcano Warning |
X |
|
|
Volcano |
|
WFA |
Wild Fire Watch |
|
X |
|
Wild Fire |
|
WFW |
Wild Fire Warning |
X |
|
|
Wild Fire |
|
WSA |
Winter Storm Watch |
|
X |
|
Winter Storm |
|
WSW |
Winter Storm Warning |
X |
|
|
Winter Storm |
|
**A |
Unrecognized Watch |
|
X |
|
Unrecognized |
|
**E |
Unrecognized Emergency |
|
|
X |
Unrecognized |
|
**S |
Unrecognized Statement |
|
|
X |
Unrecognized |
|
**W |
Unrecognized Warning |
X |
|
|
Unrecognized |
|
DCS Codes |
|
The scanner can detect the following 104 hexadecimal DCS codes. |
|
006 |
031 |
054 |
116 |
145 |
205 |
245 |
266 |
332 |
411 |
452 |
506 |
612 |
703 |
|
007 |
032 |
065 |
122 |
152 |
212 |
246 |
271 |
343 |
412 |
454 |
516 |
624 |
712 |
|
015 |
036 |
071 |
125 |
155 |
214 |
251 |
274 |
346 |
413 |
455 |
523 |
627 |
723 |
|
017 |
043 |
072 |
131 |
156 |
223 |
252 |
306 |
351 |
423 |
462 |
526 |
631 |
731 |
|
021 |
047 |
073 |
132 |
162 |
225 |
255 |
311 |
356 |
431 |
464 |
532 |
632 |
732 |
|
023 |
050 |
074 |
134 |
165 |
226 |
261 |
315 |
364 |
432 |
465 |
546 |
654 |
734 |
|
025 |
051 |
114 |
141 |
172 |
243 |
263 |
325 |
365 |
445 |
466 |
565 |
662 |
743 |
|
026 |
053 |
115 |
143 |
174 |
244 |
265 |
331 |
371 |
446 |
503 |
606 |
664 |
754 |
|
|
|
|
|
|
|
|
|
|
|
|
|
|
|
|
Reverse List |
|
Range (MHz) |
Offset (MHz) |
Range (MHz) |
Offset (MHz) |
|
29.5200 - 29.5800 |
+ 0.1 |
450.0000 - 454.9875 |
+ 5 |
|
29.6200 - 29.6800 |
- 0.1 |
455.0000 - 459.9875 |
- 5 |
|
52.0100 - 52.9900 |
+ 1 |
460.0000 - 464.9875 |
+ 5 |
|
53.0100 - 53.9900 |
- 1 |
465.0000 - 469.9875 |
- 5 |
|
143.7500 |
+ 4.375 |
470.0000 - 472.9875 |
+ 3 |
|
143.9000 |
+ 4.25 |
473.0000 - 475.9875 |
- 3 |
|
144.5100 - 144.8900 |
+ 0.6 |
476.0000 - 478.9875 |
+ 3 |
|
145.1100 - 145.4900 |
- 0.6 |
479.0000 - 481.9875 |
- 3 |
|
146.0100 - 146.3850 |
+ 0.6 |
482.0000 - 484.9875 |
+ 3 |
|
146.4150 - 146.5050 |
+ 1 |
485.0000 - 487.9875 |
- 3 |
|
146.5950 |
+ 1 |
488.0000 - 490.9875 |
+ 3 |
|
146.6100 - 146.9850 |
- 0.6 |
491.0000 - 493.9875 |
- 3 |
|
147.0000 - 147.3900 |
+ 0.6 |
494.0000 - 496.9875 |
+ 3 |
|
147.4150 - 147.5050 |
- 1 |
497.0000 - 499.9875 |
- 3 |
|
147.5950 |
- 1 |
500.0000 - 502.9875 |
+ 3 |
|
147.6000 - 147.9900 |
- 0.6 |
503.0000 - 505.9875 |
- 3 |
|
148.1250 |
- 4.375 |
506.0000 - 508.9875 |
+ 3 |
|
148.1500 |
- 4.25 |
509.0000 - 511.9875 |
- 3 |
|
222.1200 - 223.3800 |
+ 1.6 |
758.0000 - 775.99375 |
+30 |
|
223.7200 - 224.9800 |
- 1.6 |
788.0000 - 805.99375 |
-30 |
|
420.0000 - 424.9875 |
+ 5 |
806.0000 - 823.9875 |
+ 45 |
|
425.0000 - 429.9875 |
- 5 |
851.0000 - 868.9875 |
- 45 |
|
440.0000 - 444.9875 |
+ 5 |
896.0000 - 901.0000 |
+ 39 |
|
445.0000 - 449.9875 |
- 5 |
935.0000 - 940.0000 |
- 39 |
|
|
|
|
|
|
Repeater Frequency List |
|
Base Frequency (MHz) |
Offset (MHz) |
Base Frequency (MHz) |
Offset (MHz) |
|
455.0151 - 459.9950 |
- 5 |
497.0001 - 500.0000 |
- 3 |
|
465.0101 - 469.9950 |
- 5 |
503.0001 - 506.0000 |
- 3 |
|
473.0001 - 476.0000 |
- 3 |
509.0001 - 512.0000 |
- 3 |
|
479.0001 - 482.0000 |
- 3 |
758.0000 - 775.99375 |
+30 |
|
485.0001 - 488.0000 |
- 3 |
806.0051 - 823.9875 |
+45 |
|
491.0001 - 494.0000 |
- 3 |
894.0125 - 921.0000 |
+39 |
![]()
| Last updated January 23, 2018 |